 INON Z-330 FlashAfter Inon ceased production of the well known Z240 strobe earlier this year, there has been much interest in their planned replacement. Inevitably, specifications and images of Inon's new strobe are now leaking out. It is to be called the Z330 and utilizes the same, proven body design of the Z240.  Its output has been increased significantly, with a quoted guide number of 33 (compared to 24 for the Z240). Beam angle without a diffuser is 110°, and Inon claims that it has a; “robust and durable construction against the heat generated by the flash (especially in burst.)” center> Other new features include a “duckbill” rotating light shade to prevent light bleed into dome ports (to across the sand), a “super wide” diffuser and glow in the dark controls with improved large easy to use controls. center> The control layout and battery compartment are identical to those of the Z240 and the built in LED focus light has an output of 220 lumen. Actual release/shipping dates, along with prices are to be confirmed. Wetpixel will be reviewing these very shortly!
0 Kommentare
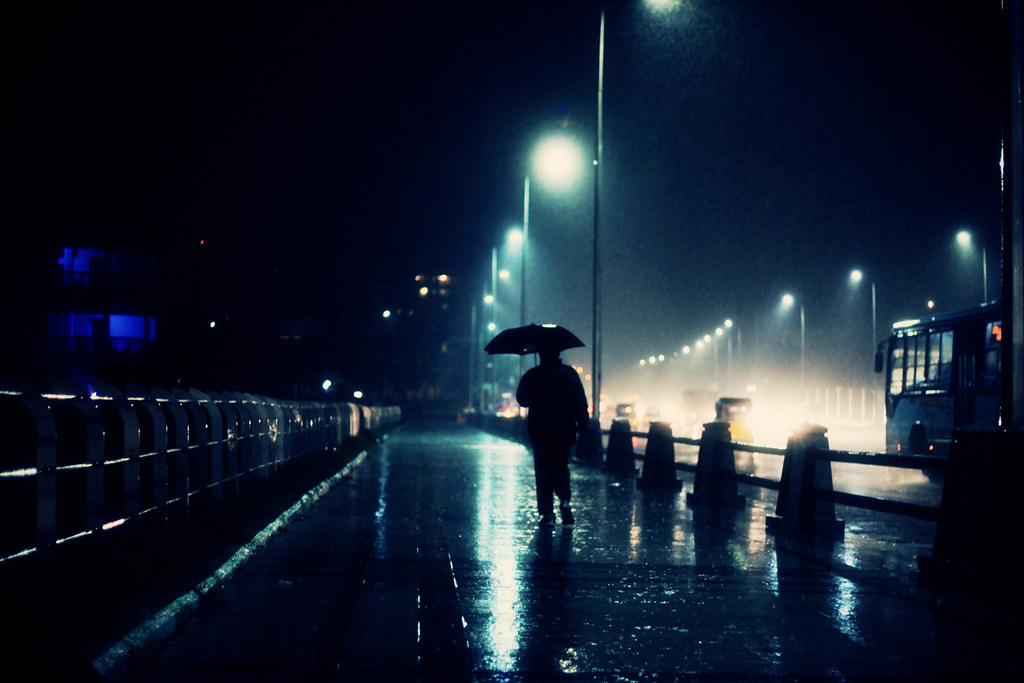
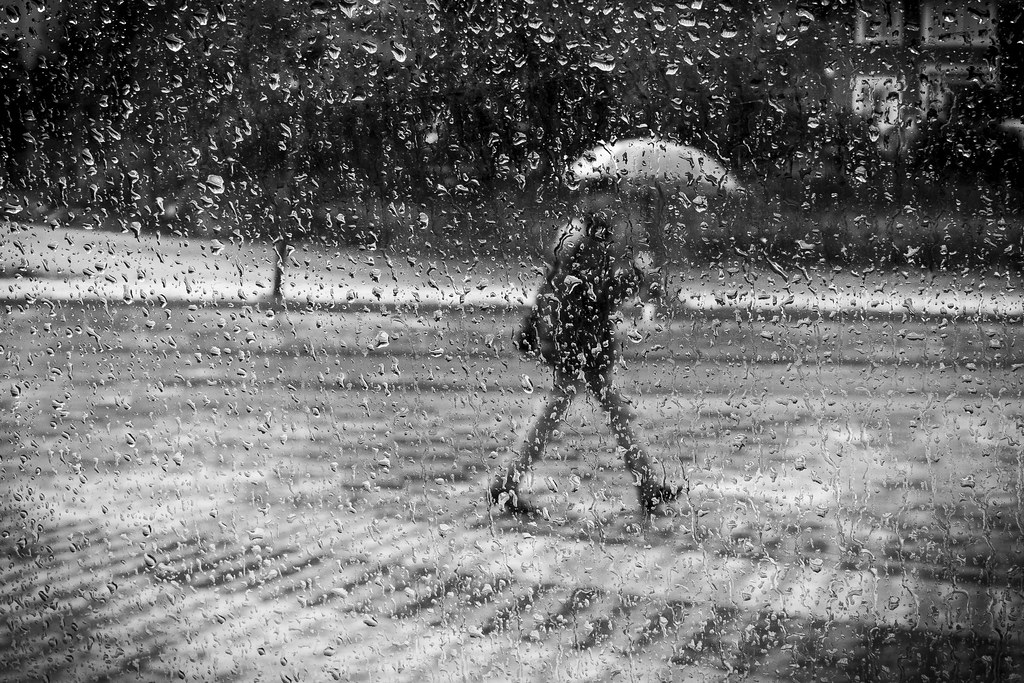
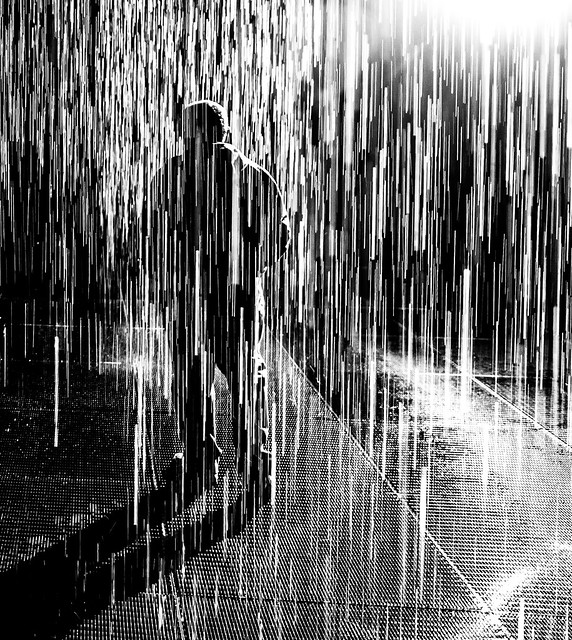
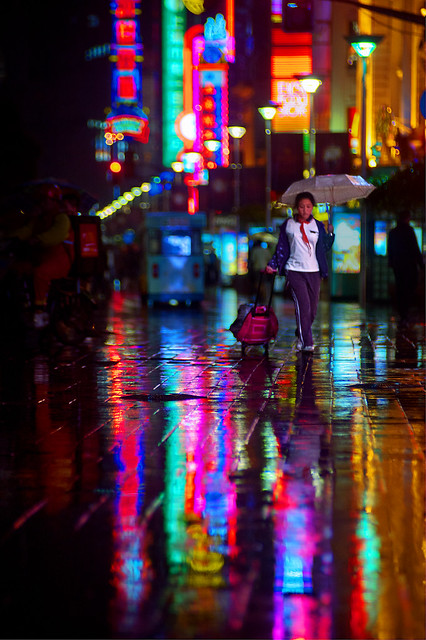
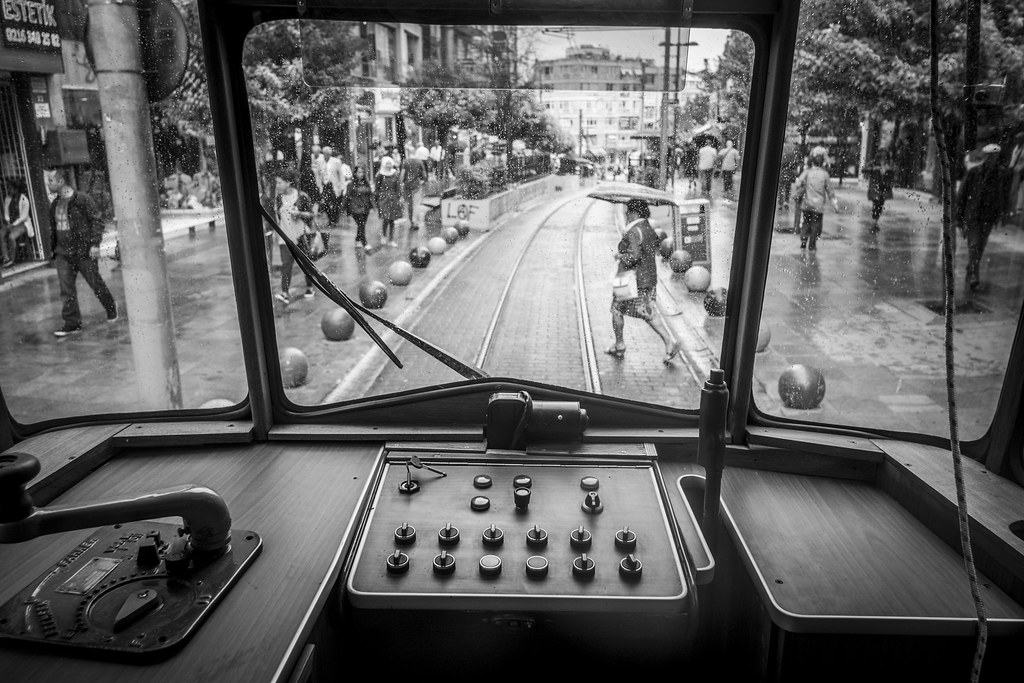
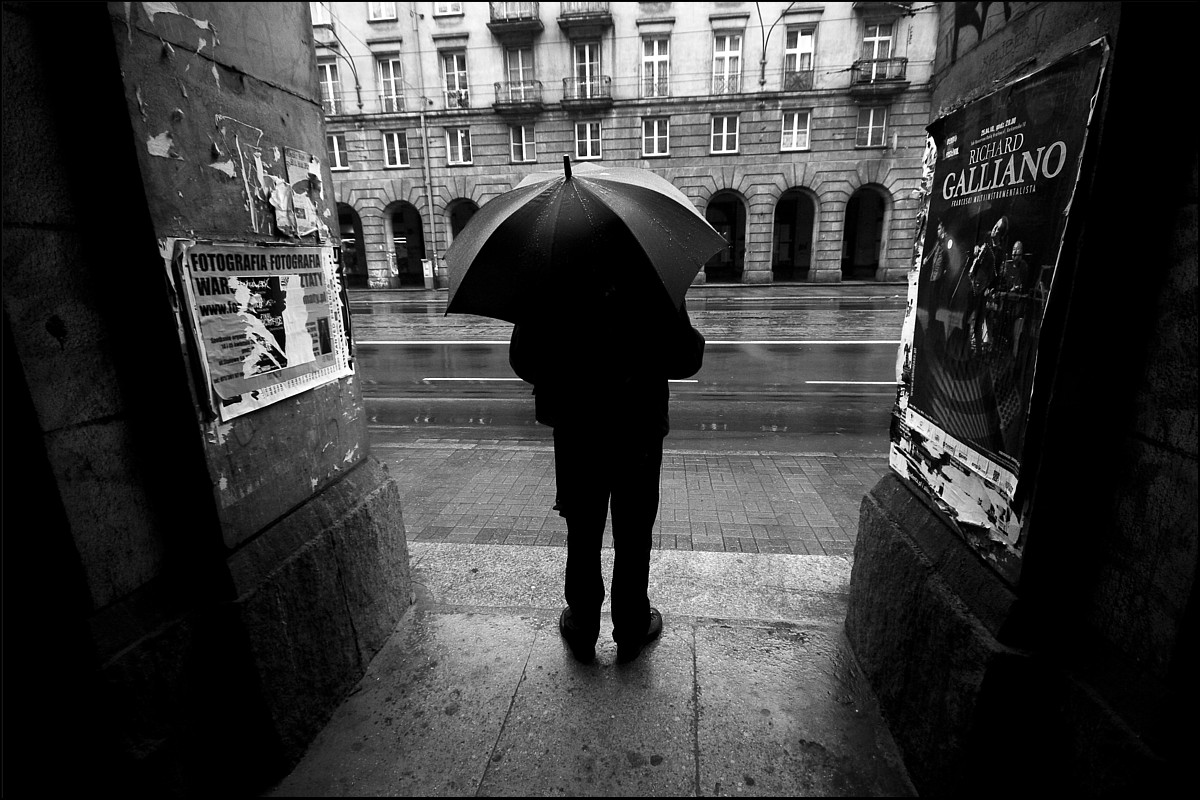
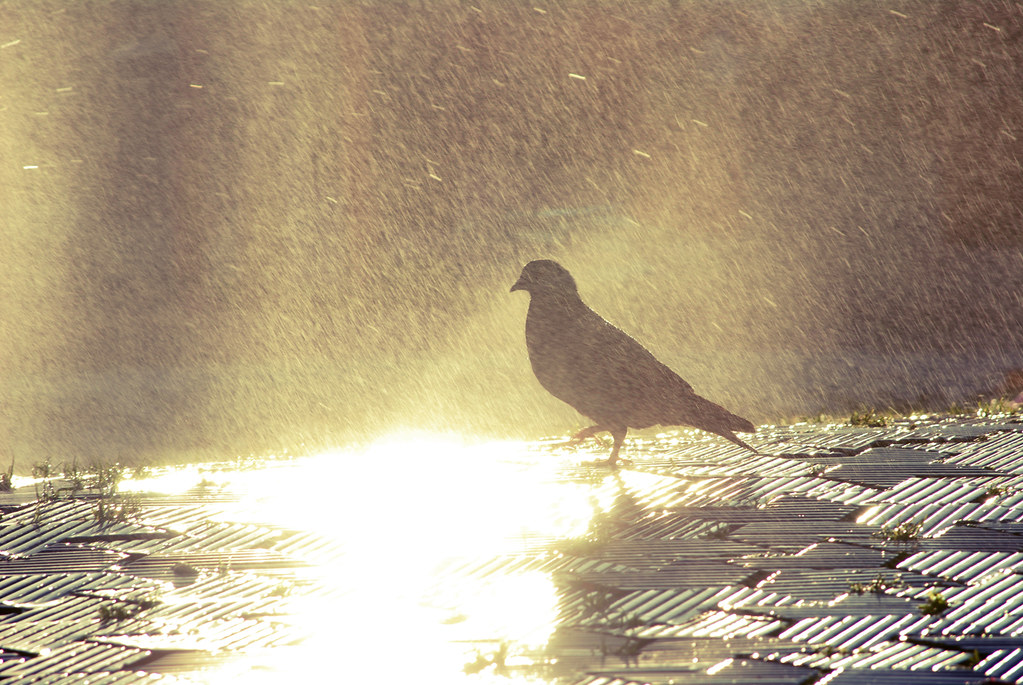
When it rains, it can be easy to use that as an excuse to put your camera aside and do something else. However, rain often provides some very unique opportunities for photography that you won't find at other times. This post is a collection of beautiful photographs captured in the rain. We hope that they inspire you to get creative with your photography regardless of the weather. If you want to be better prepared when photographing during bad weather and want to produce great photographs under any condition, do check out Kent DuFault's guide Producing Top Photography in Bad Weather over at Photzy.
Photo by Kevin Dooley
Photo by Jonathan Kos-Read
Capture Great Photographs Even During Bad WeatherIf you want to be better prepared when photographing during bad weather and want to produce great photographs under any condition, you should check out the guide Producing Top Photography in Bad Weather over at Photzy. It includes practical tips on planning for a photo excursion in inclement weather, gaining insight into what to shoot in bad light, and tons of other useful tips. Go here now to check it out. The post Photographing in the Rain: 10 Amazing Photos That Will Inspire You appeared first on Light Stalking. By now people have realized the Platypod Pro Max is a very “on the go” versatile tool. Attaching a ball head and camera makes it as rock solid as a tripod. But did you know, it's just as great in the studio? I've shown how to attach an Avenger 5/8-Inch Stud so you can mount…
When buying a Hoya filter, ensure it's not a counterfeit that's, quite literally, constructed from window glass.
When buying a Hoya filter, ensure it's not a counterfeit that's, quite literally, constructed from window glass.
By now people have realized the Platypod Pro Max is a very “on the go” versatile tool. Attaching a ball head and camera makes it as rock solid as a tripod. But did you know, it's just as great in the studio? I've shown how to attach an Avenger 5/8-Inch Stud so you can mount…
Despite the gigantic volume of second hand film bodies in existence there remains, it seems, a demand for new 35mm SLRs with a retro feel. The latest is what the manufacturer is calling a remake of the Ihagee Elbaflex, which was the name for Exakta cameras sold in West Germany during the late sixties and early seventies. This remake, however, comes with a Nikon F mount. The new model will have a fully mechanical shutter with speeds of 1/2sec to 1/500sec + B, and a single stroke wind-on crank. It will be fitted with a PC socket for flash, a hotshoe, and a flash sync speed of 1/60sec. The use of the Nikon mount obviously allows it to use old and modern lenses, though there's no mention of the extent of the aperture coupling. The camera doesn't need batteries to operate as it has no built-in meter (the company says users can use an app on their phone instead), but there is an ISO dial around the rewind crank just in case. The new camera is said to be the result of a collaboration between German and Ukrainian engineers, and the camera will be built in the Arsenal factory that made the Kiev cameras. The use of the Nikon lens mount is perhaps an echo of the Kiev 17 35mm film camera that also used the Nikon mount. It's hard to be certain what the new camera is actually based on as it uses a wooden grip and modern looking buttons and dials. The new manufacturers suggest it is an Exakta Varex llb, but it has none of the distinctive body styling, antique knobs or interchangeable pentaprism/wasitlevel finder-and the Varex llb was out of production by before the name change occurred in 1969.
The Elbaflex name was introduced to get around lawsuits by the original Ihagee owner to force the East German Ihagee East (as the company became known after the war) to pay him royalties for use of his brand. The use of the name Elbaflex is once again being used to avoid conflict with the current owners of the Exakta brand name. The manufacturer expects the body to retail for $1500 when it ships in August 2018, but early backers can get it for $530. You can get the camera in a choice of four colors, and there's also a special deal that includes the Meyer Optik Trioplan 50mm or the Lydith 30mm. For more information, visit the Ihagee Kickstarter campaign page. Press Release Kickstarter Launches for the Rebirth of the Ihagee Elbaflex 35mm Analog CameraNew Analog Camera Has a Nikon F Mount (Dresden, Germany) The famous Ihagee camera brand is making a comeback, launching a Kickstarter campaign today for its first offering, the Elbaflex, a 35mm analog camera with a Nikon F mount, stylish wooden grip and a full two-year guarantee. The Elbaflex has a simple, yet beautiful design that is aimed at the photography purist. Its designers say the fully-manual camera is intended to make a statement that the art of photography is about taking your time and making each frame meaningful. Early Kickstarter backers can get the Elbaflex for pledges that start at $529, as well as bundles that will include either the Trioplan 50mm or Lydith 30mm, both of which are fully-manually and made by German lens manufacturer Meyer Optik. The camera is expected to be shipped to Kickstarter backers in August 2018, though the first 100 cameras are expected to ship to early Kickstarter backers by July 2018. The Elbaflex, which will be handmade, is expected to have a retail price of $1,500 and be on the market in the fourth quarter of 2018. The company takes its name from the German camera pioneer that in 1936 produced the famous Kine-Exakta, a camera which eventually became known as the Elbaflex in the 1970s. The new Ihagee Elbaflex is a collaboration between a team of German and Ukrainian engineers. The German side includes former engineers and technicians who have many years of experience in the production of analog and digital cameras, as well as lenses, for Leica and Schneider Kreuznach. They will provide the engineering and design leadership, while the Ukrainian side, which includes former members of the famous Arsenal factory in Kiev, will oversee production. Sometimes you can't keep a good thing down but that doesn't necessarily mean the future is always bright and the road ahead will be smooth, as Kodak is now discovering. After reporting a $USD 15 million profit for the third quarter of fiscal 2016, the iconic film maker is now reporting a loss of $USD 46 million on $USD 379 million in revenue for third quarter 2017. Kodak's Chief Executive Officer Jeff Clarke said in a press release that the downturn was mainly attributed to a slowdown in its print business, “An overall print market slowdown and rising aluminum costs have impacted our commercial print business.” In response to the loss, Clarke outlines a plan for the company to cut costs and return to the black, mainly by cutting 425 jobs and focusing on the firm's profitable Kodak Sonora Plates and Flexcel NX.  Image from LittleVisuals.co via Pexels.com. Kodak's Chief Financial Officer predicts a return to profitability in fourth quarter 2017, saying “We plan to improve our cash balance through reducing working capital and through cost actions, including focusing investments in technologies most likely to deliver near-term returns.” New York Upstate outlines Kodak's challenges as combating a decrease in siles in the commercial print industry coupled with higher costs that directly affect the Print Systems Division, Software and Solutions Division, and Enterprise Inkjet Systems Division. Also, a transitional period for vendors in the Kodak brand licensing plans have led to decreased performance in the Consumer and Film Division. Last, Kodak has faced challenges in its attempts at introducing Advanced Material and 3D Printing Division products to the market. Kodak's current corporate model relies on commercial licensing of camera products as well as providing high-grade printing materials and equipment, two sectors increasingly under pressure as higher-end smartphone and cameras capture much of the profitable market and the commercial printing sector facing similar pressures. The post Layoffs Hit Kodak After Millions in Losses appeared first on Light Stalking. The Samsung EVO Plus 256GB memory card has been awarded as CES Innovation Award.
A good workflow is such a powerful, time-saving and inspiring thing. There is even a certain romance to it – a routine of steps melting into the background that lead to a finished photograph. This creates a result to be proud of, one to inspire you to go out and photograph more, be it a product shot, an image from a recent trip to Iceland (everyone seems to be going to Iceland), or an artistic portrait. It can also be an inexhaustible source of frustration or an excuse for procrastination. I know it's certainly been all of these things for me, and the latter much more often in the past. The people behind ACDSee Photo Studio Ultimate must have had a similar experience, too, but they created tools that set up a solid workflow foundation for any photographer.  Somehow, my desktop really is this clean. I don't know how. Mind you, ACD Systems faces an obvious, towering obstacle by the name of Lightroom, a piece of software that has been the industry standard for nearly a decade now. I've used it extensively and exclusively for just about every project in the past seven or eight years. And let's be honest, for all of its faults, Lightroom has been the most popular choice with good reason. It does many things right. In light of Adobe's recent (or was it really recent?) change of policy regarding payment (among other things), however, I have felt the need to take a look around and see if perhaps there are alternatives. ACDSee Photo Studio Ultimate is certainly one. In this article, I will go through a workflow that I've been using with Photo Studio Ultimate as I got myself properly acquainted with it. While I realize it's an entirely subjective approach to managing and editing photographs, I hope that it will at least give you a good starting point from which to individualize. An important disclaimer: The license to this copy of ACDSee Photo Studio Ultimate 2018 has been provided by the company; I did not purchase it. Having said that, it's my subjective opinion and findings that you are reading here. ACD Systems (rather happily, I must add) had next to no say in it. My words are always my own. What is ACDSee Photo Studio Ultimate?Quick OverviewMany have heard – or even used – some version of ACDSee. No surprise there as it's around two decades old now and actually precedes Lightroom. But there are few areas where Adobe does not have a monopoly, and while many remember ACD Systems, it's not nearly as popular as Lightroom. Perhaps undeservedly so, because pretty much everything Lightroom does, ACDSee does too. First and foremost, Photo Studio Ultimate 2018 is an image management software. It started off as a lightweight viewer and organizer and has not lost the idea over the years. But powerful metadata and organizing capabilities are now complemented by some very useful post-processing tools for both RAW and graphic image files. More so in this high-end version than any other (and there are plenty, which explains the mouthful of a name). Photo Studio Ultimate 2018 has been specifically designed to cater to pretty much every need you may have while editing – from culling to doing extensive graphics manipulations with layers and masks. In essence, it should be the only software you need. In that sense, Photo Studio's ambition stretches beyond that of overthrowing Lightroom. It actually has Photoshop in its sights, too. But let's not get ahead of ourselves. Going against Lightroom is hard enough already – the newly updated software throws a large shadow. We'll see if Photo Studio can shine through. Learning the EnvironmentAs I have mentioned before, ACDSee Photo Studio Ultimate was created to address all the needs of a working professional photographer or artist. As such, it incorporates powerful image management tools as well as those meant for post-processing images and specifically, RAW files. Naturally, having such vast capability meant a lot of thought has to go into the interface and user-friendliness. After all, having all the tools crammed into a single screen would leave little to no room for an actual image. Let's briefly overview the ACDSee Photo Studio interface before we get started.
Even this Ultimate version is immediately friendly upon launch, but there is a whole lot going on here. Thankfully, not much is beyond customizing. By going to the Mode Configuration in the General section of the Options dialog, you can get rid of modes you find less useful. I've immediately unchecked every mode except Manage, Photos, View, Develop, and Edit. After a second thought, I got rid of Photos, too, as I did not seem to use it at all. Much like with Lightroom Modules, ACDSee has several different environments for different tasks you may want to accomplish. All of these environments (or modes) are accessible at the top-right of the screen at pretty much any time.
If you look through the screenshots carefully, you'll notice how the mode buttons in the top-right corner of the interface keep changing. ACDSee offers plenty of options to declutter the interface, and hiding access to modes that you don't find yourself using is very convenient. In the end, I even disabled the View button since View mode is very easy to access by double-clicking on any image thumbnail. I've found the button to be redundant. Manage ModeThe first mode – that opens by default each time you launch Photo Studio – is Manage. This mode is meant for navigating your hard drive, importing images (which by itself is never necessary, but rather handy all the same), applying keywords and filters, and so on. You will likely spend a lot of time here and start your work in this mode more often than not.  Manage mode screen. You will be spending a lot of time in Manage mode and thus a view similar to this (after some tinkering) should be immediately familiar. The interface is dominated by the Image Grid, as it should be. But that's not to the detriment of other information, such as metadata and even the Histogram. Navigation is easy and there are some useful quick-access tools at the bottom of the screen for image rotation and comparison. Photos ModePhotos mode is similar to Manage in that it can be used to find and view images. However, rather than letting you navigate to a specific folder on your hard drive, it shows every image that you have on your computer in chronological order, similar to how Gallery works on your smartphone. You can choose a specific year to be shown using the Timeline panel (positioned on the left by default), and further narrow it down from there if you need to. Hovering over any given image will show an enlarged preview with some basic information next to it (where the image is stored, its dimensions, and more). View ModeThe View mode is at the core of ACDSee and as the name suggests, is meant specifically for viewing images one by one, full screen. In addition to the View mode, which is launched whenever you double-click on an image within ACDSee, there is also Quick View. This is an even lighter image viewer that, by default, launches when you double-click an image anywhere on your hard drive. It's part of ACDSee, but also isn't. For the purposes of speed, Quick View does not launch the full ACDSee software. As is, View mode is already very speedy and gets on with displaying images very well once the software is up and running. A simple task, but one Microsoft has not managed to do well for decades and ACDSee always seems to get right. Develop ModeAn important mode that you are likely to end up using as much as Manage is Develop. This, as the name suggests, is designed for post-processing images. Specifically – it's the RAW converter environment (similar to Adobe Camera RAW). It offers tools to fine-tune exposure, white balance, noise reduction, and sharpening, along with some immensely powerful tools, such as Tone Curves. I will be paying a lot of attention to this mode as Develop, along with Manage, is what ACDSee simply must get right.
Develop mode holds few surprises to anyone who's used any RAW converter before, as the fundamentals are usually the same. The screen is dominated by a large image preview and there is a useful Filmstrip underneath for quick navigation within the selected folder. Notice the conveniently presented exposure and camera information right next to it (bottom right corner of the image above). The left side of the screen is where the main tools are placed by default, but the whole panel can be relocated. See those blue circles? They show which settings have been altered from their default values. Clicking on the blue circle will temporarily disable those adjustments, but not completely discard them. Edit ModeComplementing the Develop mode is Edit. This is where ACDSee starts to target Photoshop in addition to Lightroom. For some users, it will more or less replace Adobe's best-known software. It offers layers, masks, and sophisticated retouching tools – suffice to say, too much to cover in this article.
Edit mode is a whole new piece of software, it's so capable and complex. While some elements are similar to those you will find in Develop mode, a lot is different. There is a Layers panel on the right side, while the left and top portions of the interface are absolutely packed full of tools. We will cover all of the modes in more detail in upcoming articles. For the purposes of this one, however, we will mostly focus on Manage and Develop, as these two modes are crucial for RAW file management and post-processing. Image Management and Post-Processing Workflow with ACDSee Photo Studio Ultimate 2018Importing Files from a Memory CardImport is convenient even if it is ultimately not a must-use feature. It's still very much an option to just move files from the card to your hard drive the drag-and-drop way if you so wish. But the ACDSee Import tool offers to apply metadata, rename, and backup files and is simply very useful. You can even save import presets to speed up the process further if you regularly do photo sessions of specific types, and it's easy to classify them. This I like very much as it saves plenty of time once you set them up. But there is a caveat – the Import tool is really only meant for images that are not yet on your hard drive, but stored somewhere on an external device, be it a USB drive or a memory card. And while you can “import” image files that are already on your hard drive (select Disk from the Import drop-down menu using the top-most toolbar), there is little point to do so as ACDSee does not use a catalog system and you can already see all the images on your computer. So, after popping a memory card in hit Alt+G (or select Import from the toolbar at the top-left corner of the screen). At this point, you will be asked to select the source device (an external one, such as a USB drive or a memory card) and, once that is done, you'll be greeted by the Import dialog box.  Once inside the Import dialog, there's not really much control over the source directory. No way to select all images from a specific sub-folder, either. You can choose to show only images taken on a specific day or those that are new (not yet on your computer), but, other than that, you'll have to select images manually.  The Import dialog gives access to metadata presets, along with everything else. This is a powerful feature that can potentially save you a lot of time. In some cases, it may take your mind off keywords for good. Very handy, but beware of the seemingly infinite text fields in there. Importing itself is refreshingly simple on the eyes. Using the main Import dialog is rather straightforward. Select the destination via the Location section of the dialog, where you can also specify a backup location for a second copy of the files to be saved. There is an option to rename files and it's infinitely customizable. So is the metadata changes that you can apply upon import. I try to take care of this particular part of my workflow during import as it means I won't have to assign all the necessary metadata information to so many files later on. Organizing Images by Applying FiltersThe import process itself is swift. More so than with Lightroom, as ACDSee does not need to add the RAW files to an internal catalog, and can instead display them immediately. Once the images have been copied to your hard drive (or, alternatively, you've navigated to a set of images already on it) with basic metadata hopefully already applied, it's time to do the tedious task of culling. Culling your imagesI prefer to leave out as many images as I can before I move on to post-processing (during which I tend to drop a few more images), and ACDSee has plenty of filters to make the task easy.
Part of the reason why import is as swift as moving images manually from memory card onto your hard drive is that it is pretty much all that's happening. ACDSee does not add files to a catalog like Lightroom does. Another important aspect is the image preview – rather than render its own previews immediately, ACDSee uses embedded JPEGs before any edits are applied. Basically, at first, you see the exact same image as you would on the back of your camera. This can be changed in the options, as shown in the screenshot, but I'm not sure why you would. Proper previews are rendered once you start developing the files, but for the initial sorting? Embedded is probably the best way to go about it and saves so much time. It's always been a real struggle for me to sort through the initial batch of image files – it's never easy to judge your work fairly, is it? So breaking the process into several steps has helped me a lot. First things first – ratings. Photo Studio permits a numeric rating ranging from 1 to 5 to be assigned to any file. It's as straightforward as you think – the lower the rating, the less you like the image. My routine involves going through images and only assigning a 5 (Ctrl + 5) to the files I find good enough, and 1 (Ctrl + 1) to images that are safe to delete with certainty. Once I've done both and the lowest rating images are off my hard drive, I select a rating 5 filter to only see photographs that passed the initial sorting. You can do that by selecting the Filter drop-down menu above the image grid.  73 product shots of a printed catalog. And as much as I enjoyed taking the photographs and then doing the layout… I am not sure I am ready to edit 73 images of it. Let's get to culling.  See that? Ratings applied, filter turned on, and we are left with 20 images. Much better, but not quite enough. The second sorting resulted in just 8 out of the total 73. I obviously still need to dial down the trigger-happy (can't really show how I sort through images if I pick 9 out of 10, right?), but at least I don't struggle with choice quite so much. Now, I said rating 5 goes to images that are good enough for a reason – by removing a large number of similar images during initial sorting, I make it that much easier for myself to see the photo shoot as a whole and judge which photographs don't fit. At the same time, I don't pressure myself to only keep the very best images after the initial sorting, as that may take too much time. So I sort through the 5 rated photographs one more time. This time around, I assign a rating of 4 to images that are not quite what I was trying to achieve. These files get dropped, but should I change my mind, I know they are marked with 4 and are always easily accessible. I may end up deleting unrated files at some point, but I always keep the 4 rated ones just in case. Hopefully, the second sorting has left me with a small number of photographs that I really like. Now that there are much fewer files remaining, I can give each one a lot more attention. At this point, I tend to go through the files one by one in full screen view (double-click on any thumbnail or select a file and hit View mode) and pre-visualize the final result that I want to achieve as I did while photographing. What sort of editing will I need to do to each one? Will it require conversion to black and white? Is extensive retouching or complex local adjustment of tones and colors going to be necessary?
ACDSee has a lot of filtering, sorting, and grouping options. And I do mean a lot. They can all be used to narrow down which image files you want to be shown. It's not just the Filter menu, but the ones next to it, too. More often than not (the photographs I used for this article are a strange exception, which is why I won't bore you with additional screenshots), around half the images will end up being monochrome as I tend to photograph in such a manner, and they need to be separated from the color images for easier batch processing. For that, I tend to use a color label. Assigning a label to any given file is just as simple as rating images, only this time you need to use Alt instead of Control in combination with a numeric key. So, for example, Alt + 1 will result in red label (hitting Alt + 0 will reset label to none). I tend to assign the first color label (red) to images that will require conversion to monochrome and the second one (yellow) to those that are part of a panorama and will need merging. The rest of the labels still get used. If there are images of several separate panorama shots located next to one another, I use the remaining colors to separate them for easier visual discerning later on. Finally, there is one final sort that needs to be done. Using the Tag filter (the \ key), I mark images that will require more complex, graphic retouching than simple RAW converters are rarely designed for. Usually, that would mean moving on to Photoshop at some point. With ACDSee, the built-in alternative in the form of Edit mode is all many people will need. Either way, tagged image files would end up undergoing considerably more complex editing. Post-Processing with the Develop ModeTo anyone who has used Lightroom (or Camera RAW, or any other RAW image processor for that matter), the Develop mode will be instantly familiar. Perhaps not in the fits-like-a-glove sort of way, at least not at first, but there are definitely no big surprises to be had.  Ignore the identical color scheme. Develop mode is an entirely different environment to the Manage mode that we've already got to know a little bit. See how many of the toolbars at the top are now gone? The menu is different, too. Importantly, there are a bunch of sections and tools designed for local adjustments hiding just above the histogram. These are easy to miss. Don't, because they are also very useful and sometimes absolutely necessary. The filters I apply to sorted images – color labels and tags – are extremely helpful for batch post-processing. As selecting a certain filter hides image files that are to be developed in a different manner, I am not only able to apply similar adjustments to several images at a time but I can only see color or black and white images in the Filmstrip too. How is that relevant? Simple – it helps with achieving consistent luminance, contrast, and color of the photographs, as I am able to compare them and notice differences that need compensating for as I work. While photographing, I tend to leave white balance in Auto as I know my camera will get it more or less right. As for exposure, I tend to work in manual mode, especially in high-contrast lighting where prominent highlights and shadows are plentiful (as was the case with these product shots). Manual mode means my composition does not affect the exposure when dealing with the same basic scene, so while there is always the chance I may end up under or overexposing, (having gotten used to setting up my own exposure, it does not happen often), there is also more consistency shot-to-shot. And that makes adjusting exposure in post-production much simpler, as I can apply the same corrections to a few images at a time. That's made easier by the Filmstrip in Develop mode – just select a few images and apply the adjustments as needed. Alternatively, you can process a single image and then copy/paste the settings onto a different image. Both actions are accomplished by right-clicking on the thumbnail in the Filmstrip to first copy, and then paste settings to a corresponding file.  Adjusting exposure and white balance to taste gives me a good starting point from which to dive a little deeper. But since I'm using the General adjustments anyway, I might tweak a few more sliders while I'm at it. After adjusting the white balance and exposure sliders (which, strangely and inconveniently enough, only allows 4-stops of adjustment, 2-stops each way), I had a solid starting point from which to move on to more specific tone and color adjustments. ACDSee has plenty of tools for that, perhaps even too many. In the General section of Develop tools, there's Highlight Enhancement and Fill Light sliders. Both of these can only be set in one direction, meaning a positive adjustment or nothing. What's more, Fill Light encompasses a very broad range of tones, from dark ones all the way to highlights. So if you're used to Lightroom adjustments of highlights and shadows, you'll find it a little sensitive. On the other hand, Fill Light might just save you if you've underexposed your RAW file by more than the 2-stops the exposure slider allows you to compensate (with modern image sensors, you may find yourself doing that on purpose, too).  I expected the Fill Light slider to only really “fill” the shadows, but it did a bit more than that. I find this a little too close to how fill flash works while photographing. That said, it's not without uses and ACDSee does have alternative tools, should you require finer tweaking. Either way, it's a good thing there's an alternative tool in the shape of Light EQ, which is much more akin to the blacks/shadows and whites/highlights adjustments Adobe's software incorporates. Using it is also very easy – simply select the tool and click on any area of the image. Light EQ will adjust the tones automatically – brighten them up if you click on a shadowy area, and bring the tones down should you click on a bright, highlight-intensive bit of the image. Want more control? Choose Standard (which I prefer), or Advanced mode (a touch confusing), which will allow you to click-and-drag on the photograph itself, in addition to using the sliders. Clicking on any tone will adjust it across the whole image – drag up to increase brightness, down to deepen the shadows or restore highlights.
In case Light EQ is also not to your liking, there's the trusty Tone Curves tool. These tools tend to work pretty much the same everywhere. In simplicity lies its strength, as the Tone Curves tool is immensely versatile.  Before Curves.  After a Tone Curve was applied. I can't stress enough how powerful (and sometimes complex) the seemingly boring Tone Curves tool is. As you can see from this before/after comparison above, not only does it affect tonal contrast, but also color. Pull down the shadows and you'll notice saturation increase. You may find yourself needing to compensate for the increase in saturation via the Saturation slider or the Color EQ tool. Either way, Develop mode offers plenty of control over all the tones in your image.  If I had to single out a favorite tool of mine in Develop mode, it would be Color EQ. Much like HSL panel in Lightroom, it allows very precise control of color. I was able to bring down the orange hues of the table while keeping the beautiful reds and greens just so (for my taste). It helped me achieve decent consistency across the whole selection of images with minimal effort.  This particular product shot only really needed so color adjustment, which was achieved using the Color EQ tool more than anything else. I've also pushed the mid-tones a bit using Tone Curves, but not enough to burn out the highlights. For the images I tasked myself with editing, I mostly used a combination of Light EQ, Tone Curves, and Color EQ, setting up each one to taste. The latter is, again, extremely versatile and works much like HSL panel does in Lightroom. It allows you to adjust the saturation, brightness, and hue of each individual color channel (see screenshot above). As you may notice in the screenshots, I went for a very desaturated look (mostly the red, orange, and yellow channels). Whatever you choose to do, Color EQ offers plenty of control and is perhaps by far my favorite tool in the Photo Studio Ultimate Develop mode. Lastly, I added a little warmth to shadows using the Split Tone tool (Shadows Hue set at 44, Saturation at 4, and Balance at 24), and adjusted Sharpening in the Detail tab of the Develop Tools panel.  The Geometry panel is accessed via a tab at the top of Develop Tools. Here, you can crop and adjust an image for distortion. It's great that ACDSee has lens profiles to take care of distortion for you, though any vignetting you may want to fix, is up to your own judgment for now.  Before image.  After processing. There's a Whole Lot MoreScratch the surface, I told myself when I started writing this article. At least scratch the surface. I am still unsure if I managed to do that. There is more luck than planning involved in my choice of images for this article. Should I have gone for something more demanding – an artistic portrait, perhaps – it would have been at least twice as long. ACDSee Photo Studio Ultimate 2018 (to use its full set of names) is immensely packed with tools and settings. So much so that I used only a small fraction of what Develop mode offers for my product shots. Black and white conversion was left untouched, so were the local Develop Brush and Gradient tools. These edits required next to no Geometric correction or attentive use of noise reduction, not to mention Edit mode. Even so, it has proved to be an exceptionally versatile bit of software. My hope is this article has provided you with an insight into how ACDSee works and how it can be used as part of an efficient, stress-free workflow for your business and artistic needs. Disclosure: ACDSee is a paid partner of dPS. The post ACDSee Photo Studio Ultimate: Efficient RAW Workflow for Professionals by Romanas Naryškin appeared first on Digital Photography School. Medium format snappers, architectural photographers, and landscape photographers, here's something that should tickle your fancy. Swiss camera maker ALPA has recently introduced its latest camera package for film photographers: the ALPA 12 SWA equipped with ALPA Apo-Helvetar 5.6 43 mm lens. You'd have to be fast, though, as it's super limited edition with only five kits up for grabs.
It really couldn't get more retro than Polaroid, the instant camera that enables you to capture the moment and print instantly. Polaroid have now released the Polaroid Pop, and all just in-time for Christmas, making a perfect gift idea. This new sleek camera is capable of producing 3.5×4.25-inch prints that will keep family and friends amused over the festive season. The new Pop features the readily available 3.5×4.25 Polaroid instant print format. This isn't however a tradition Polaroid instant camera, the retro inspired styling takes on an ultra modern twist and the camera itself will be available in a variety of colours including; Yellow, Pink, Black, White, Blue and Green. Flip the camera over and you'll see a large 3.97-inch built-in LCD so you can preview your images and check the composition before you take. Images are captured at a very decent 20mp resolution. These images can then be printed directly from the camera through the built in ZINK Zero printer, as we all expect from a Polaroid. If you don't want to print there and then you don't have too. As this Polaroid is completely digital you can either save those images for later (This model accepts MicroSD cards up to 128GB in capacity) or Wi-Fi or BlueTooth them across to another device. Keeping up with the latest trends the Polaroid Pop will also enable you to shoot 1080/720p full HD video and 15-second Gifs. The new Polaroid Pop is available now for £199, for more information check out the Polaroid website. The post New ultra compact Polaroid Pop hits the streets appeared first on Camera Jabber. This year has been phenomenal for instant photography, especially for Polaroid Originals and the iconic Polaroid cameras. On top of new films, new cameras, improved emulsions, and everything in between, the icing on the cake is a new documentary about the magic of Polaroid photography. Fujfilm X-E3 Snap VerdictThe X-E3 completes Fujifilm's cycle of updating its mirrorless system cameras to the 24.3Mp X-Trans CMOS III APS-C sensor and X-Processor Pro processing engine combination that appears in the X-T2, X-Pro2, X-T20 and X100F. As a result, it's capable of producing high-quality images with plenty of detail and attractive colours that are dictated by the selected Film Simulation mode. It also has an ingenious touch-control system and a mini-joystick that takes the place of a traditional navigation pad and really improves the handling. It's a gem of a camera. Overall Score:  For Fujifilm X-E3
Against Fujifilm X-E3
What is the Fujifilm X-E3?The Fuji X-E3 is an APS-C format compact system or mirrorless camera with the Fujifilm X lens mount. It's the replacement for the 16Mp Fuji X-E2S which was announced in January 2016. Like the camera it replaces, it has a rectangular rangefinder-like design and an electronic viewfinder built-in.
Fujifilm X-E3 SpecificationPerhaps the biggest, but also the most predictable upgrade that the X-E3 makes to the X-E2S is the change from a 16Mp sensor to a 24.3Mp device. It's predictable because it's the same 24.3Mp X-Trans CMOS III APS-C sensor as has appeared in the Fuji X-Pro2, X-T2 and X100F. Also, like these other cameras, the sensor is paired with the X-Processor Pro processing engine. This combination enables a standard sensitivity range of ISO 200 to 12800 with extension options taking it to ISO 100 to 51200. It's also possible to shoot up to 21 uncompressed raw files or 35 jpegs at 14fps (frames per second) using the electronic shutter. If you want to focus continuously, however, this drops to 11fps and 53 jpegs or 21 uncompressed raw files. Switch to the mechanical shutter drops the maximum rate to 8fps for 62 jpegs or 25 uncompressed raw files. In another significant upgrade upon the X-E2S the 3-inch 1,040,000-dot screen on the X-E3 is a touchscreen. And in addition to the usual Touch Shot, Touch AF and Focus Area Selection options there's a Touch Function feature that enables gesture control that's familiar from smartphones.
AutofocusFujifilm has updated the phase detection autofocus algorithm to boost its performance with moving subjects. This is now claimed to take around half the time of the X-E2 to focus and subject can be half the size that it needs to be with the X-E2S. According to Fujifilm, the X-E3 can also get subjects sharp in as little as 0.06sec. There are up to 325 focus points (in a 13 x 25 grid) available for selection, but if you prefer this can be limited to 91 (in a 7 x 13 grid). These can be selected individually in single focus point mode or the camera select one automatically in Wide/Tracking AF mode. Alternatively, there's Zone AF which is useful when you know roughly where the subject will be in the frame. Like the X-T2 and X-T20, the X-E3 has a collection of five autofocus customisation options that tailor how the camera responds in continuous autofocus mode (AF-C). Unlike the X-T2 (but like the X-T20), it's not possible to adjust the individual parameters such as Tracking Sensitivity that are controlled by these settings, but they are a useful addition to the feature set. The options are:
Video specificationFujifilm doesn't offer a dedicated video camera like the Panasonic GH5 and Sony A7S II but it enables photographers to shoot video that compliment the stills by using the Film Simulation modes. It's possible to record 4K (3840 x 2160) at 29.97, 25p, 24p or 23.98p and 100Mbps for up to 10 mins at a time. Full HD (1920 x1080) movies can be recorded at up to 59.94p and 36Mbps for up to 15 mins. If you want to shoot continuously for longer than that you'll have to drop to HD (1280 x 720) which can be maintained for up to 30mins. There's an HDMI Micro port available if you want to record to or view footage on an external monitor and a 2.5mm socket is available for connecting an external mic (via a 2.5/3.5mm adaptor).
Build quality and handlingLike the X-E2S, the X-E3 has a rectangular rangefinder-like shape with the viewfinder fitting within the rectangle rather than protruding above the top-plate like the mini-DSLR X-T20 and X-T2. It's like a smaller version of the X-Pro2. Unlike the X-Pro2, however, there's no optical element to the viewfinder, it's purely electronic.
Although the grip on the front of the X-E3 body is quite shallow and there's only a small thumb-ridge on the back, they are both covered with a grippy, textured finish that makes the camera feel comfortable and secure when you're shooting one-handed. And while it feels okay with a lens like the XF 18-55mm F2.8-4 R LM OIS mounted, it looks and feels more natural and better balanced with a prime lens like the XF 23mm F2 R WR.
Control arrangementAlthough the X-E3 will seem familiar to X-E2S users, there are some significant and welcome changes to the control arrangement. The most significant of these is that Fujifilm has done-away with the usual navigation pad on the back of the camera. Instead, there's a mini-joystick control that Fuji calls a 'focus lever'. This sits in line with the Menu, Display and Playback buttons and falls within convenient reach of your right thumb. It makes it easy to navigate through menu options, make settings selections and set the AF point. It's much faster and easier to use than the navigation pad.
Further good news is that getting rid of the navigation pad means there's more room on the back of the camera for your thumb so the X-E3 is easier and more comfortable to hold than the X-E2S. Fujifilm has also given the X-E3 a front dial, which works in tandem with the rear dial for scrolling through menu options and browsing through settings. While there's a lens aperture ring and both shutter speed and exposure compensation dials on the X-E3's top-plate there's no sensitivity (ISO) dial. However, there's an 'ISO Command Dial Setting' option in the Set-up menu that enables you to set ISO via the new front command dial. I found this useful for those occasions when I wasn't using the camera in Auto ISO mode.
Touch-ControlAs I mentioned earlier, the X-E3's screen is touch-sensitive and it's possible to swipe up, down, left and right to access key features such as AF mode, sensitivity (ISO), Film Simulation mode and white balance. Initially, I had mixed success with using this gesture control but then I discovered the swipes need to be quite fast. When the camera doesn't respond, the natural response is to drag your finger slowly, but the camera seems to be looking for a quick swipe so you need to do the opposite. Once you've sorted out how to activate the Touch Functions, it takes a little while to remember which way to swipe to access what you want, but it's something you become familiar with and it speeds-up making adjustments. These gestures can also be used while the camera is held to your eye and you can specify whether you want to use the whole screen or just the left or right area. This is a bit trickier to use for left eye users, but it's pretty nifty for right-eyed shooters. It's possible to customise the Touch Function via the Button/Dial setting option of the Set-up menu and there's a total of 31 options available, plus 'Off'. In addition, you can drag your thumb on the screen to select the AF point you want while you look in the viewfinder, but I found it easier to use the Focus Lever (joystick).
Viewfinder and screenWhile it's not the largest EVF that Fuji as on offer, X-E3's electronic viewfinder provides a clear view of the scene and it matches the final image well. The screen is also good and doesn't suffer excessively from reflections. It's disappointing, however, that the screen is fixed. It would be nice if it were possible to tilt it to have a clearer view when shooting from high or low angles. A dual-tilting mechanism like on the X-T2, or even a more common vari-angle hinge would be even better.
PerformanceAs I mentioned earlier, the X-E3 has the same sensor and processing engine as the Fujfilm X-T2, X-Pro2. X-T20 and X100F. This means that it produces very similar images and noise is controlled well throughout the native sensitivity range (ISO 200-12,800). Naturally, some detail is lost at the uppermost settings, but the results are good and even the expansion settings can produce passable images. As you'd expect, if you want the best images, the sensitivity should be kept to the lower values as that ensures the highest level of detail and best colour saturation. Ideally, keep to ISO 3,200 or lower but don't stress too much if you need to go to ISO 6400 or even 12,800. Fujifilm's Film Simulation modes, combined with the Shadow and Highlight tone controls allow you to give jpegs the look you want. Everyone has their favourite, but some suit some scenes better than others. I particularly like Classic Chrome for it's slightly muted colours and warm tones. I like to push the Shadow tone pup a little to deepen the shadows and boost contrast. Acros is also another favourite for black and white images. As with other Fujifilm cameras, the X-E3's automatic white balance setting is a good default option, but the Daylight setting delivers slightly more attractive results in some natural light situations (shade for example) – in others, it's indistinguishable from the Auto WB result. ExposureAs it has an electronic viewfinder that can show the image as it will be captured, taking into account the exposure and colour settings, it's rare that you'll find an image that isn't exposed as you'd like it to be. Nevertheless, I found that in its Multi setting the X-E3's 256-Zone metering system copes well with some scenes that might fool other cameras. When photographing a river under an overcast sky, for example, it delivered an excellent image with no intervention on my part. In fact there were remarkably few occasions when I needed to use the exposure compensation dial to prevent the subject from being under- or over-exposed. If you should underexpose an image, either accidentally or to protect the highlights, you'll find that the X-E3's low ISO raw files have good dynamic range and can withstand quite substantial brightening. AutofocusThe Fuji X-T2 or X-T20 is perhaps the more natural choice for shooting sport and action as their shape works better with long lenses, but the X-E3's autofocus system is fast and accurate so it is feasible to shoot fast-moving subjects with it if you want. However, the X-E3 is more at home with small prime lenses than it is with long telephoto zoom optics, so it's more likely to be used for landscape, documentary and street photography. But it's good to have the potential if you need it – and fast focusing can be useful for street photography. The X-E3's AF system also proves reliable in quite low lighting and with the XF 23mm F2 R WR mounted, it achieved sharp focus even with some really low contrast subjects during my testing. Wireless TransferI found the X-E3's Bluetooth and Wi-Fi automatic image transfer system rather hit and miss. There were many instances when I saw the lights on the camera flashing as I turned it off, but when I checked my phone, the images weren't there. The problem was usually solved by opening the Fujifilm Remote app on my phone and tapping the camera's name to reform the connection. The app usually issued a warning about the need to open the phone settings and connect to the camera's Wi-Fi system, but if I waited a few seconds it worked it out for itself. From this point, I could then use my phone to browse the images on the card in the camera and select the ones I wanted to transfer – and they would copy across without a hitch. After that any images, I shot subsequently would also usually transfer automatically until the next time that the camera and phone were out of range and I'd have to make the connection again. It's clear that there's a little work to be done before we can expect automatic image transfer to be seamless. Sample Images ISO 200  ISO 12,800  ISO 800 Follow this link to view and download full-resolution X-E3 files Fujifilm X-E3 Review Sample Images
VerdictWhen I first heard about the X-E3 I assumed it was a mini X-Pro2 with a cutdown feature set that meant it was destined to be the camera people bought if they couldn't afford the one they really wanted. However, Fujifilm has made it much more than that and there are valid reasons why people might choose it instead of the camera above it in the manufacturer's line-up. For a start, it's smaller and lighter, but it also offers a different way of working that cuts through some of the button use that can slow you down. The Touch Function gives a speedy route to four key features (provided you can remember which is accessed in which way) and the joystick controller that Fuji likes to call a focus lever, takes the place of a space-hungry navigation pad. As well as being easier to use with your thumb while you're looking in the viewfinder, the joystick takes up much less space than the usual navigation pad so the camera looks cleaner and is easier to hold. And while the X-E3 might be shaped to make it more comfortable for use with prime lenses, it has an autofocus system that can make good use of longer optics, so you can use it to photograph a wide range of subjects – including sport Add to this the fact that Fujifilm cameras have a recipe that enables them to deliver attractive looking images with pleasant colours and nice mid-tone contrast you start to see why the X-E3 really hits the spot. I just wish it has a tilting screen and that Fuji can hurry-up and iron out the Bluetooth/Wi-Fi connection issue. Fujfilm X-E3 RatingOverall Score: Features:  Build and Handling:  Performance: Image Quality: Should I buy a Fujifilm X-E3?If you like traditional exposure controls, want a fairly small camera that has an understated appearance and is capable of delivering high-quality results, then the Fujifilm X-E3 is a great choice. It's a camera you will grow to love.
The post Fujifilm X-E3 Review appeared first on Camera Jabber.
The Sony a7R III is the highly anticipated update to the very popular a7R II. Since it uses the same sensor as its predecessor, it might seem like this is more an incremental release, but this helpful video will highlight the newest and most improved features to help you decide if it's worth the upgrade. [ Read More ] Vimeo has launched a dedicated camera for its new Vime Live platform, introducing Mevo Plus, price tag $500. Mevo Plus boasts a 12.4-megapixel 4K sensor that can capture video in 3840 x 2160 resolution at 30fps. What's more, iOS apps can be used to run real-time face recognition via the iPhone's camera. Video can be recorded to the camera directly or streamed via ethernet, WiFi or LTE. The Mevo Plus will replace the original Mevo, which is being phased out. Mevo Plus is designed for use with Vimeo's new Vimeo Live platform, launched in September, and aimed at professional users. Other features of the Mevo Plus include a 16:9 aspect ratio, 150-degree field of view and one-hour battery life. Mevo Plus Livestream like a Pro from Mevo Camera on Vimeo. While the Mevo Plus is priced $500, the original Mevo price tag has decreased to $300. Vimeo is also offering a Mevo Plus Pro Bundle for $800 that includes a stand, case, tripod and Mevo Boost. Click here for more details on the Mevo Plus. Via DPReview, Venture Beat The post Vimeo launches Mevo Plus camera for livestreaming appeared first on Camera Jabber.
This photograph was taken at 2AM on Disko Bay in Greenland. I had been sailing for several hours between immense icebergs, and the clouds were building in such a way that it was becoming clear that the sunrise was going to be something special. Upon approaching a patterned iceberg floating between smaller pieces of ice, the light struck it from the side in a way that accentuated its texture. The smaller ice pieces provided the foreground, and it all really came together wonderfully. The image won a gold medal on the 2015 Arctic Awards. Photo taken with a Canon 5D Mark III and Canon 16-35mm f/4L IS. Erez Marom is a professional nature photographer, photography guide and traveler based in Israel. You can follow Erez's work on Instagram, Facebook and 500px, and subscribe to his mailing list for updates. Erez offers photo workshops worldwide.
When we got our hands on Chinese camera maker YI's first mirrorless camera, the YI-M1, we didn't have a lot of positive things to say. Despite a great sensor, the camera was... unrefined. But the company just released a new firmware version for the M1 that promises to smooth out some of its rougher edges. Key updates include (much-needed) improved AF speed, the addition of a RAW+JPG shooting option, exposure control in P, A, S and M modes when shooting video, AF/MF control during video capture, and the addition of a histogram in live view while shooting both stills and video. We've updated our review model to the latest firmware and are taking it for another spin to possibly update our review, but in the meantime, check out the release notes below to see what all YI has improved and fixed on the M1 with this newest update. Release Notes {PressRelease} Firmware Version 3.0-int Update LogsNew
Fixed Fixed some known bugs, and improved the overall stability of the system. Changed Change the thumbnails in each screen from 9 to 12 images. {/PressRelease} Sony has claimed 15 EV dynamic range from its newest ILC iteration: the a7R III. Is it true, or is it like Sony's odd claim that the a7S had 15 EV dynamic range? Turns out: Sony has some strong grounds for its claim here. The Sony a7R III retains its dynamic range even in bursts. That's a big deal for a Sony ILC At the launch event in NYC, we were able to gather enough data to measure the 'engineering dynamic range' of the a7R III.* And it is impressive. Possibly as important: for the first time the a7R III retains this dynamic range even in continuous drive. That may be a big deal for any kind of photography that includes action or moving subjects. But how true is Sony's claim?
Sony has found a way to reduce shadow (or 'read') noise in its files such that the final output has higher dynamic range, and cleaner shadows if you need them, than files from its predecessor. To summarize it in a number at base ISO: 13.6 EV at the pixel, or for a 42.4MP file. Or 14.8 EV if you like to compare to DXO numbers (and only generate 8MP images from your 42.4MP camera). Either way, that's a nearly half-stop improvement over its predecessor. See our table below, which also compares the a7R III to the full-frame chart-topping Nikon D850, ranking based on highest performer:
While the Nikon D850 is the top performer here, its important to note that this is only the case if you can give the D850 the extra ~2/3 EV light it needs at ISO 64 (which you often can if you're shooting bright light or a landscape photographer on a tripod). At ISO 100, the a7R III dynamic range actually exceeds that of the D850, thanks to incredibly low read noise. That's impressive for a camera constantly running its sensor in live view. At ISO 100, the a7R III dynamic range actually exceeds that of the D850... impressive for a camera constantly running in live view Keep in mind, though, that if you can give the D850 the extra exposure to take advantage of its ISO 64 dynamic range, all tones in your image benefit from the higher signal:noise ratio-even midtones and brighter tones will be more amenable to post-processing and sharpening thanks to being more 'clean' and less noisy to begin with. The D850 is able to tolerate as much total light as the medium format Fujifilm GFX 50S, as we showed here. That's what allows one to get unbelievably crisp, 'medium format-like' like files from a Nikon D810 (try zooming into 100% on that linked image and tell us you're not impressed). But the Sony a7R III gets you nearly there. While in some circumstances the Nikon D810/D850, or medium format, may afford you slightly cleaner more malleable files, the a7R III takes a significant step at closing the gap. And that's nothing short of impressive for a mirrorless ILC constantly running its sensor for a live feed (and all its benefits). As for Sony's marketing, it sounds like the claim of 15 EV is believable, but only technically if you consider how your images look when shrunk to 8MP files. To be fair, there's some benefit to comparing dynamic range figures after resizing camera outputs to 8MP, since it's a common basis for comparison that doesn't penalize cameras for having higher resolution (and therefore smaller pixels). In depth vs. a7R IILet's take a deeper dive. Here are our 'engineering' dynamic range measurements of the a7R III vs. the a7R II. 'Engineering' dynamic range means we are measuring the range of tones recorded between clipping and when the shadows reach an unacceptable noise threshold where signal is indistinguishable from noise (or when signal:noise ratio = 1). Have a look (blue: a7R III | red: a7R II): The a7R III shows a 0.42 EV, or nearly a half a stop, improvement in base ISO dynamic range over the a7R II. That's not insignificant: it will be visible in the deepest shadows of base ISO shots of high contrast scenes. Suffice it to say the a7R III improves on low ISO dynamic range, without sacrificing anything on the high end It's worth noting our a7R II figures are higher than DXO's published 12.69 EV (13.9 EV 'Print') figures, possibly because they tested an older unit prior to uncompressed Raw and improvements to Sony's compression curve. We retested it literally today with the latest firmware, and get figures of 13.2 EV or 14.4 EV normalized for 'Print' (Bill measures 13.3 EV, which you can see by clicking the camera name in the legend). See our 8MP, or 'Print' normalized, dynamic range figures below. These are more comparable to what DXO might report, for the benefit of your own comparative efforts (blue: a7R III | red: a7R II):
You can see the Sony a7R III encroaching on the ~15 EV rating of the Nikon D850 at ISO 64, but achieved at ISO 100 on the Sony, thanks to lower read noise. Impressive, though keep in mind again that the overall image quality improvement of an ISO 64 file from a D850 is due to total captured light (and it's all about total captured light, which you can read about here). Independently, our friend Bill Claff has tested the a7R III and also shows a similar 0.3 EV improvement over the Mark II (you can see the dynamic range numbers by clicking on the relevant camera in the legend at the upper right). He also shows the slight advantage of the Nikon D850 over the a7R III, which comes in at 13.7 EV vs. the a7R III's 13.6 EV at the pixel level.** Sony: a job well done. And all this at no cost to high ISO performance (we have comparisons coming showing parity between high ISO a7R III and a9 performance). Now, Sony, if you could please offer us visually lossless compressed Raw so we don't have to deal with >80MB files (and longer write times and fewer images per card) for no reason, I'm sure we would all be happy... ISO-InvarianceA camera with such great dynamic range performance suggests it's probably fairly ISO-invariant, but is it? Well, yes and no. It's ISO-invariant in exactly the way it should be, but not so in the ways it shouldn't be. Confused? Read on. The a7R III, like many Sony predecessors, has a separate higher conversion gain (HCG) circuit at the pixel. You can think of this circuitry as amplifying the signal at the pixel level more than at lower ISOs, at the cost of higher tones, to protect it from any downstream noise.*** The a7R III, like its predecessor and the a9, switches to this HCG mode at ISO 640, using it for higher ISOs as well. The HCG mode ensures the camera has amplified its signal so much that any remaining noise barely affects it before it's digitized. That's why the camera shows no difference between brightening an ISO 640 Raw file in post vs in-camera by raising your ISO. While we'll have a more rigorous and controlled ISO-invariance test coming soon, you can see even in our cursory test at the launch event below that comparing an ISO 6400 shot (amplified or brightened in-camera) to an ISO 640 shot taken with the same exposure but raised 3.3 EV in-post to maintain the same brightness as ISO 6400 shot shows no difference at all in noise performance: What's the advantage to the latter? 3.3 EV of highlights you otherwise lose by amplifying to ISO 6400 levels in-camera, but that you don't lose if you ask ACR to digitally brighten 3.3 EV in post (anything that gets blown from that 3.3 EV push can easily be recovered in ACR since it's there in the Raw file). Below ISO 640 there's some extra noise to, say, shooting ISO 100 and boosting 6 EV in post as opposed to shooting ISO 640 and boosting 3.3 EV. But there's simply no excuse to the camera's traditional ISO 6400 method of shooting ISO 6400-appropriate exposure and then amplifying the analog signal 6 EV in post to get ISO 6400 levels of brightness; instead, 2.7 EV of that push could be done in the analog domain by switching dual gain to ISO 640 levels, but the remaining 3.3 EV push should be saved for Raw conversion in order to retain 3.3 EV (or more) of highlight detail. Indeed, this is easily seen in Bill Claff's 'Shadow Improvement' graphs that show little to no benefit to analog amplification above ISO 640 on even the Sony a7R II (or ISO 400 on the Nikon D850). And only a highlight cost of stops, upon stops, upon stops, since tones get amplified above the clipping point of the ADC at higher ISOs. I'm going to use this as an opportunity to ask manufacturers like Sony, Nikon and the like: please accept the digital revolution that even your video departments have accepted (in their 'E.I.' modes). Please stop throwing away highlight data for almost no shadow benefit to ostensibly stick to poor antiquated 'film' analogies, or to work around CCD/CMOS read noise limitations that no longer exist. We've been singing this tune since 2014 when we designed our ISO-invariance test, and it's even more relevant today with dual-gain architectures. ACR understands digital 'push' tags and you can brighten the image preview (and JPEG) as necessary. This is not to single out Sony: Nikon, Olympus and Panasonic are just as easy to blame, if not Canon of late after having modernized its sensor architecture to catch up with the rest. Footnotes: * Sony's claim that the a7S had 15 EV dynamic range was confusing, as no commonly used measure of dynamic range that we know of measured it as such (you'd have to downsize a7S' images to 3.7MP to claim 15 stops). However, since there's no set standard for dynamic range measurement, it's hard to say whether or not anyone's claim is 'right' or 'wrong'. ** But again, that's not the whole story until you consider the higher signal:noise ratio of all tones at ISO 64 on a D850 compared to ISO 100 on any other full-frame at ISO 100. *** Technically, the HCG circuitry generates a higher voltage swing per photoelectron at the read stage, effectively generating a larger signal for the same photoelectron count than the lower conversion gain circuit that is optimized for higher dynamic range capture when higher exposures are possible. |
AuthorDies und das zum Thema Leben. Archives
Januar 2019
Categories |


 RSS-Feed
