|
Korean lens maker Samyang has been known to throw out teasers when they have new lenses in the works and staying true to form, the company is at it yet again. There have been SAR reports over the last several months about some possible Samyang FE lenses that were in development but until now nothing from the company indicated that a new lens was actually incoming.
0 Kommentare
If you've been reading over the last couple of days you may have seen these already: Next up in this summary is post-processing.
Most Popular Post-Processing Articles of 2017
Whew, that is a lot, but it's a big category with lots of options now available to you for processing your images. Can you help us with a quick poll? Since there are so many new photo editing software options – please fill in any that you are using below. It will give us a better idea of what to cover in the upcoming year! Thanks for your assistance and for reading. Note: There is a poll embedded within this post, please visit the site to participate in this post's poll. The post Most Popular Post-Processing Articles of 2017 by Darlene Hildebrandt appeared first on Digital Photography School. Have Your Say: Best Gear of 2017
For the past few weeks we've been running a series of polls to find out what you - our readers - think of the major product releases of 2017. For the first round of voting we made six initial polls covering lenses, compact cameras and interchangeable lens cameras (ILCs). Now that those polls have closed, we're pleased to announce the winners. Thanks to everyone that voted! But the voting isn't (quite) over yet. You don't get away that easily... In this slideshow we're announcing the winners and runners-up in each category, and kicking off a final poll, to determine which of the twelve individual winners from the first round should be crowned as your choice for overall best gear of 2017. Best smartphone camera - Runner-up: Google Pixel 2
In terms of 'pure' photography (if that's even a thing, anymore, in the age of smartphones) the Pixel 2 turns out some of the best images you'll find from any curren smartphone, and at the moment holds the top spot in DxO's Mobile rankings. Stills and video (up to 4K/30p) footage looks great, and future firmware updates promise further enhancements. The Google Pixel 2 just edged out the Samsung Galaxy Note 8 to take the runner-up spot in this year's readers' choice poll for best smartphone camera. Best smartphone camera - winner: Apple iPhone X
All screen, all the time (well, apart from that awkward notch). The Apple iPhone X is the company's flagship handset and the most significant redesign of the iPhone's 10-year history. As a photography device, the X delivers excellent still images, a useful Portrait mode, some fun lighting effects, and truly stunning 4K video. It's not cheap, but it's your pick for the best smartphone camera of 2017. Best prime lens - Runner-up: Sigma 14mm F1.8 Art
One of the first new lenses we used in 2017 turned out to be one of the best. It's a big piece of glass, but the Sigma 14mm F1.8 Art is a stunning lens, equally as useful for landscapes and cityscapes as it is for more specialist applications like astrophotography. Clearly this fast, wide prime has impressed you too, earning (we think) a well-deserved runner-up spot in this year's readers' poll for best prime lens of 2017, just beating Sony's FE 85mm F1.8. Best prime lens - Winner: Sigma 135mm F1.8 Art
Sigma really cleaned up this year, taking both winner and runner-up spots in our readers' poll for best prime lens. Just edging out the 14mm F1.8, Sigma's 135mm F1.8 was your overall pick, and deservedly so. The combination of speed, sharpness and handling is hard to beat. We rate this lens very highly, and clearly so do you. Best zoom lens - Runner-up: Tamron SP 70-200mm F2.8 G2
Plenty of great zoom lenses were released in 2017 from all of the major manufacturers, but Tamron's two F2.8 G2 lenses were a hit with our readers. Taking the runner-up spot (just) is the 70-200mm F2.8 G2. We love this lens for its combination of compact build, excellent handling and effective image stabilization. Great image quality and a low price compared to big name competitors doesn't hurt either. Best zoom lens - Winner: Tamron SP 24-70mm F2.8 G2
And the winner, beating out some outstanding competition (including Sony's pair of excellent wideangle zooms) is Tamron's G2 24-70mm F2.8. An affordable alternative to offerings from Canon and Nikon, the Tamron 24-70mm F2.8 G2 performs well, handles well, and delivers solid image quality. Third-party lenses are always popular with DPReview readers, and for good reason. The Tamron 24-70mm F2.8 G2 has clearly proven a hit with you this year. Best high-end compact camera - Runner-up: Sony Cyber-shot RX10 IV
Yes, we know that the Sony Cyber-shot RX10 IV isn't exactly 'compact' (thanks to the many people that pointed that out in the comments on these polls and the DPReview awards article) but technically, fixed-lens cameras of this type are classed as such, and we're not very good at coming up with new names for things. Sony are pretty good at naming things, but when all you have to do is just count upwards, it's probably pretty easy. The fourth model in the company's RX10-series, the Mark IV improves on the Mark III (which also came second, in last year's DPReview readers' poll for best compact) with the addition of phase-detection autofocus to its already very impressive feature set. Best high-end compact camera - Winner: Fujifilm X100F
OK, now you have to admit that this one is pretty compact. The Fujifilm X100F is another fourth-generation camera, but compared to the Sony RX10 IV it's a very different beast. There's the larger, APS-C format sensor for one thing, and a fixed, fast 35mm equiv., prime lens, as well as a hybrid optical / electronic viewfinder. Beyond the core specifications, the Fujifilm X100F offers an entirely different handling experience. More refined, more discreet, more traditional. And slightly more popular with you, our readers, apparently. The award for best high-end compact of 2017 goes to the Fujifilm X100F. Best entry-level ILC - Runner-up: Panasonic Lumix DC-GX850
Designed to be as small as possible, the DC-GX850 comes kitted with a slimline collapsible lens and a stripped-down control interface which makes heavy use of a tilting touch-sensitive LCD screen. There are better cameras out there for beginners wanting to learn about the practice of adjusting exposure, but few which can fit as comfortably into a handbag or jacket pocket. The DC-GX850 is evidently a hit with our readers, earning the runner-up spot in our poll to find the best entry-level ILC of 2017. Best entry-level ILC - Winner: Olympus OM-D E-M10 III
We've really enjoyed testing and using the Olympus OM-D E-M10 III since it was released this summer. Despite being absolutely tiny, it offers full manual control, in-depth custom options and a great feature set. Yes, this is an entry-level camera, but features like 5-axis in-body stabilization, a high-quality electronic viewfinder and 4K video make it one of the most versatile models in its class. We selected the OM-D E-M10 III as our choice for the best entry-level ILC of 2017 recently, and it's obvious that you agree. Best midrange ILC - Runner-up: Fujifilm X-E3
We loved the X-E2/S but with the launch of the X-T10 and X-T20, we didn't really expect to see it superseded. We were pleasantly surprised, therefore, when the X-E3 arrived on the scene. The X-E3's combination of classic handling and excellent image quality is hard to argue with, and clearly it's popular with you, our readers too. The X-E3 took the runner-up spot in this year's midrange ILC poll, with 14.8% of the total vote. Best midrange ILC - Joint-winner: Fujifilm X-T20
There were a lot of tight polls this year, but none was tighter, for longer, than the contest for best midrange ILC. In the end, with only 0.2% of the total vote separating the two front-runners, it's only fair that we call them joint winners. First up is the Fujifilm X-T20 - one of Fujifilm's new generation of mirrorless ILCs, featuring a 24MP sensor and DSLR-style ergonomics, plus a high-resolution, tilting touch-screen. The X-T20 is a fantastic performer, and in our opinion, one of the most likable cameras in its class. Obviously you agree. Best midrange ILC - Joint-winner: Nikon D7500
Joint-winner of our 2017 Readers' choice award for best midrange ILC is a very different, but still very likable camera. The Nikon D7500 is a powerful DSLR that inherits a lot of its core features from the professional D500. Capable of shooting at up to 8 fps with a 51-point AF system borrowed from Nikon's previous-generation flagship DSLRs, the D7500 is a fast and capable camera. Since its release earlier this year we've been hugely impressed by the D7500, and apparently so have you. Best high-end / professional ILC - Runner-up: Sony a9
This poll was so tight that we issued a last-minute request for more votes to break a tie between four cameras - two runners-up and two front-runners. A handful of last-minute votes just (and we do mean just) nudged the Sony a9 ahead of the Fujifilm GFX 50S to claim the runner-up spot in our readers' choice poll for best high-end ILC of 2017. The Sony a9 is one of the most technologically advanced cameras we've ever seen, capable of reliable high-speed capture in the kind of demanding environments that professionals need to work in. It impressed us in our full review, and obviously it has impressed you too. Best high-end / professional ILC - Joint-winner: Nikon D850
With 0.4% of the total vote separating the two front-runners, this was another extremely tight poll and one in which (again) we've opted to award two cameras the winning position. The Nikon D850 is one of our favorite DSLRs of recent years, and was joint-winner (with the Sony a7R III) of our DPReview Award for best high-end camera, and runner-up for product of the year when DPReview staff voted internally earlier this month. Clearly, some of our readers are having the same arguments that we did, because the results of this poll basically match our own opinions after testing this year's crop of high-end ILCs. With 27.3% of the total vote, the Nikon D850 is joint winner of this year's readers poll for best high-end ILC, alongside... you guessed it... Best high-end / professional ILC - Joint-winner: Nikon D850
The Hasselblad Lunar! Just kidding, that would be ridiculous. There was only really one more contender for best high-end ILC of 2017, and that was the Sony a7R III. Announced towards the end of the year, the a7R III rewrote the rules for mirrorless interchangeable lens cameras, providing high resolution capture without compromising on speed, and a solid hybrid stills/video feature set. It seems like there's not much that the a7R III can't do. Some people will still prefer an optical viewfinder and more conventional DSLR ergonomics (clearly - since the D850 was joint-winner in this poll) but the a7R III closes the gap between DSLR and mirrorless technology more convincingly than any previous camera in its class. After a nail-biting poll, the a7R III is a well-deserved joint winner of this years' readers' choice award for best high-end ILC. Have Your Say
You've seen the results from our six polls, so now's the time to pick an overall winner. You can vote for up to three of the products in this poll, and voting closes at midnight (PT) on January 4th, 2018. We'll announce the overall winner and runner-up early in the new year. And before you know it, it'll be time to round up the best product of 2018! How time flies... As always, thanks for voting, and for contributing to DPReview over the past year. We couldn't do any of this without you and we don't take it for granted. Happy holidays from all of us, to all of you. .Voting is easy - you pick your favorite products by dragging and dropping. You can pick up to three, and rank them in order of priority. Well crafted paper food by Samuel Shumway.Graduated from Parsons School of Design with a BFA in Illustration, Samuel Shumway is a stop-motion animator, videographer, prop designer, and fabricator who lives and works in New York City. The last years he has worked with diverse media companies including Nickelodeon, HarperCollins Children's Books, Klutz, and others. Furthermore, he has taught at The Montessori School in Park Slope, Brooklyn. These lovely crafted paper food illustrations show his creative skills. Just check them out below. For more, please visit Samuel Shumway's website.                 All images © by Samuel Shumway. Do not hesitate to find more inspiring work in our Illustration category. The post Paper Food Crafted by Samuel Shumway appeared first on WE AND THE COLOR. For its entry into the outdoor enthusiast market, Tenba has announced the release of its new Solstice Backpacks. Designed for adventurous photographers, filmmakers, and creatives who are always on the go, the Solstice promises to provide secure gear access and all-day carrying comfort.
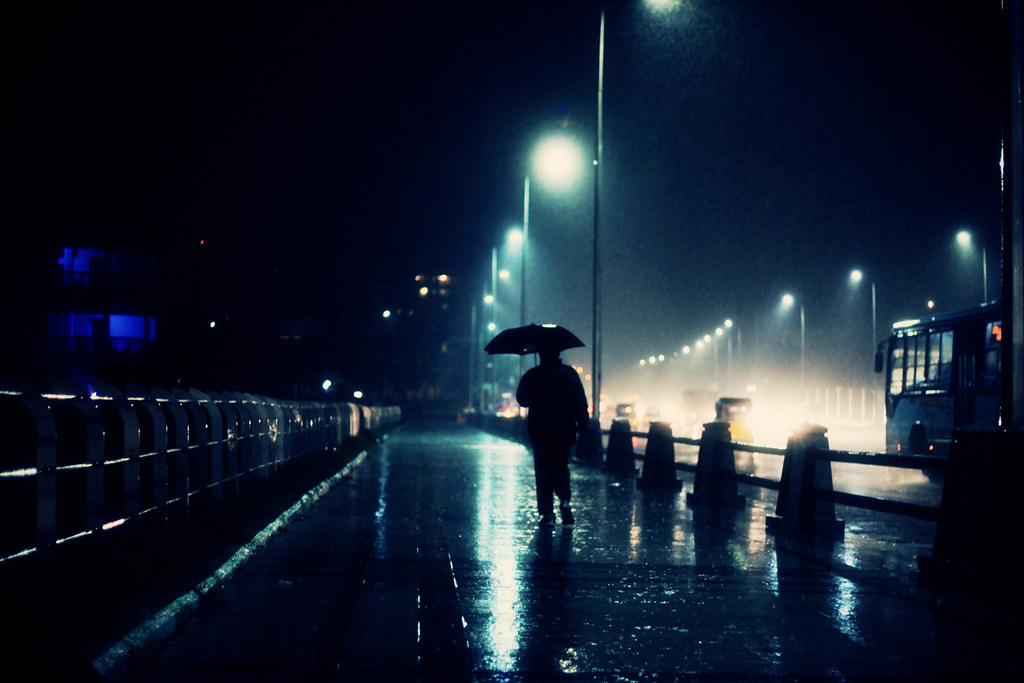
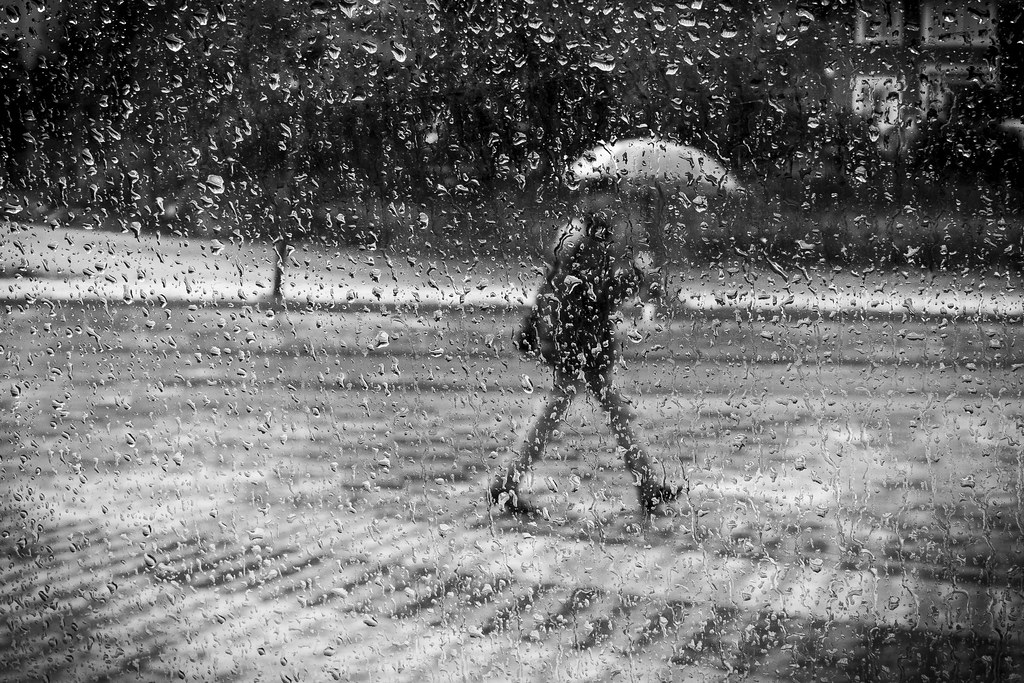
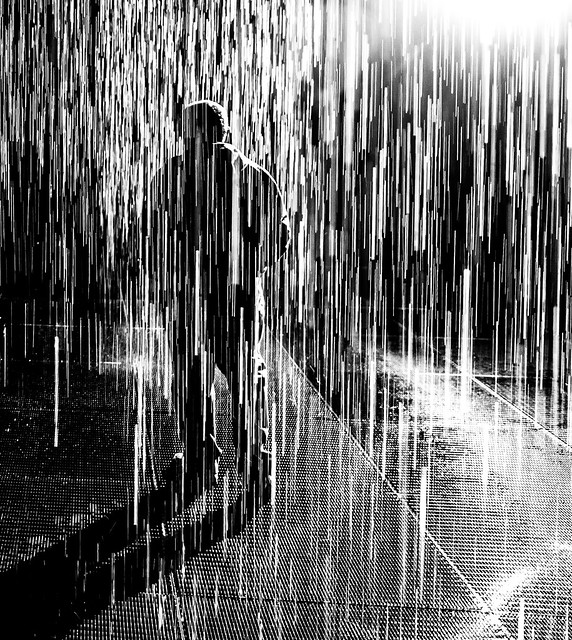
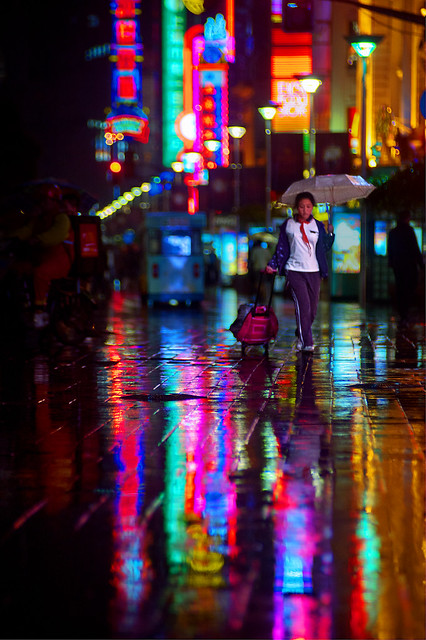
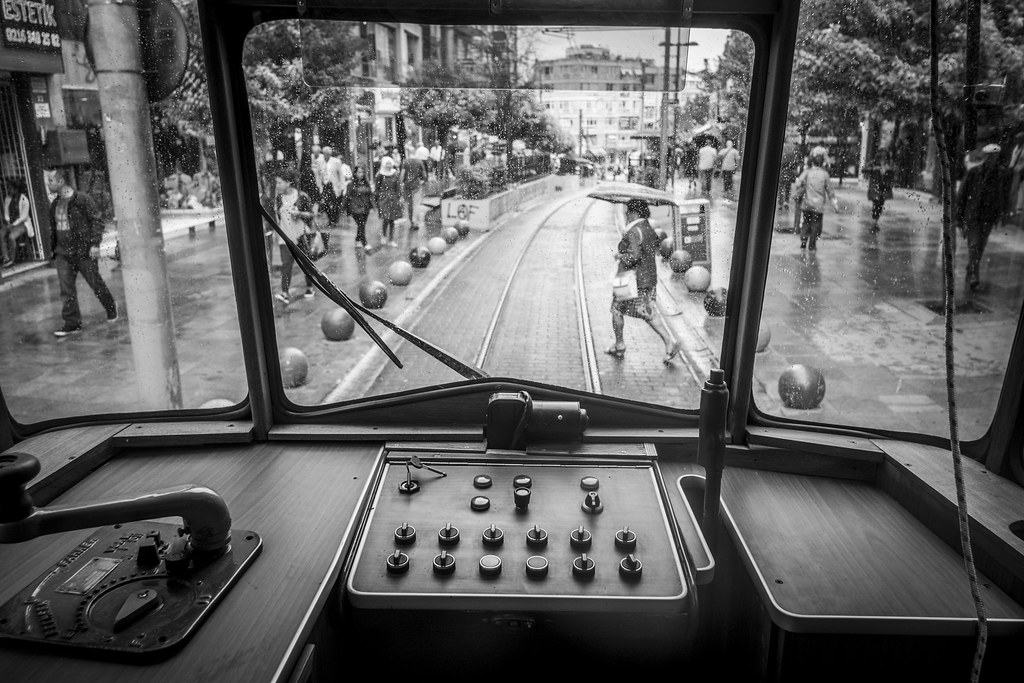
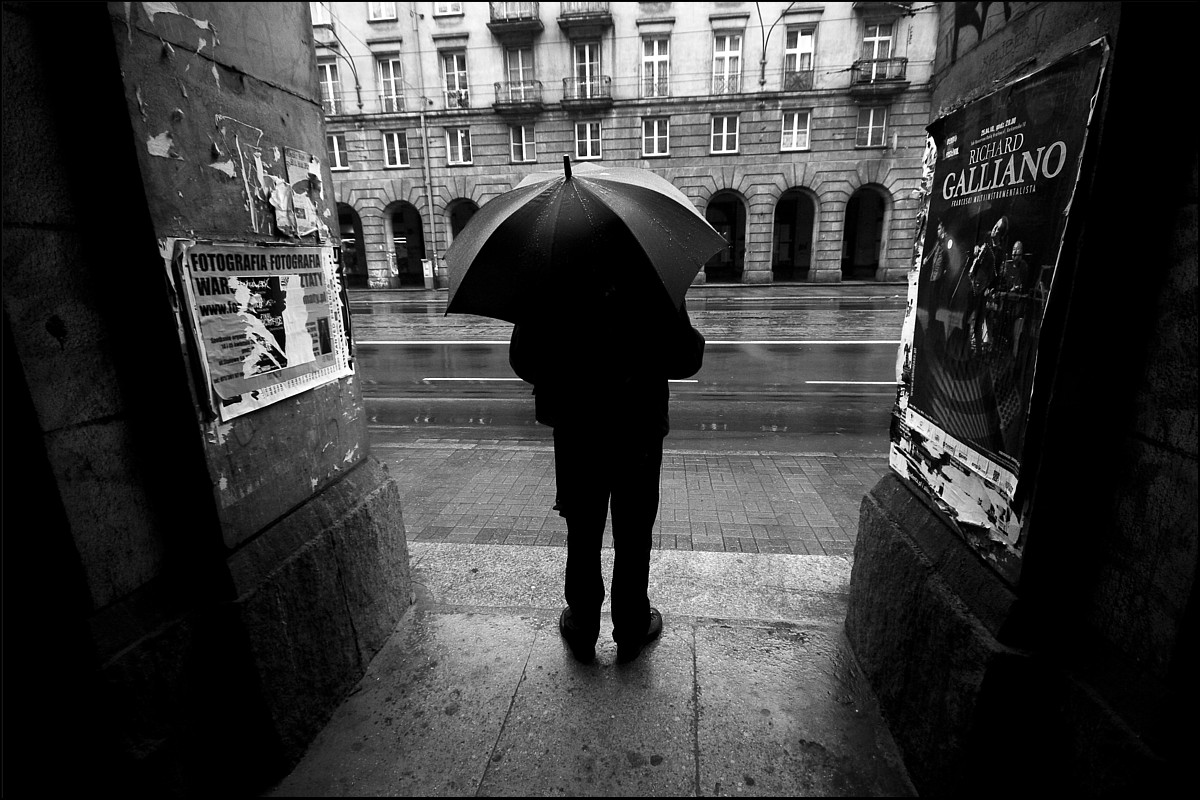
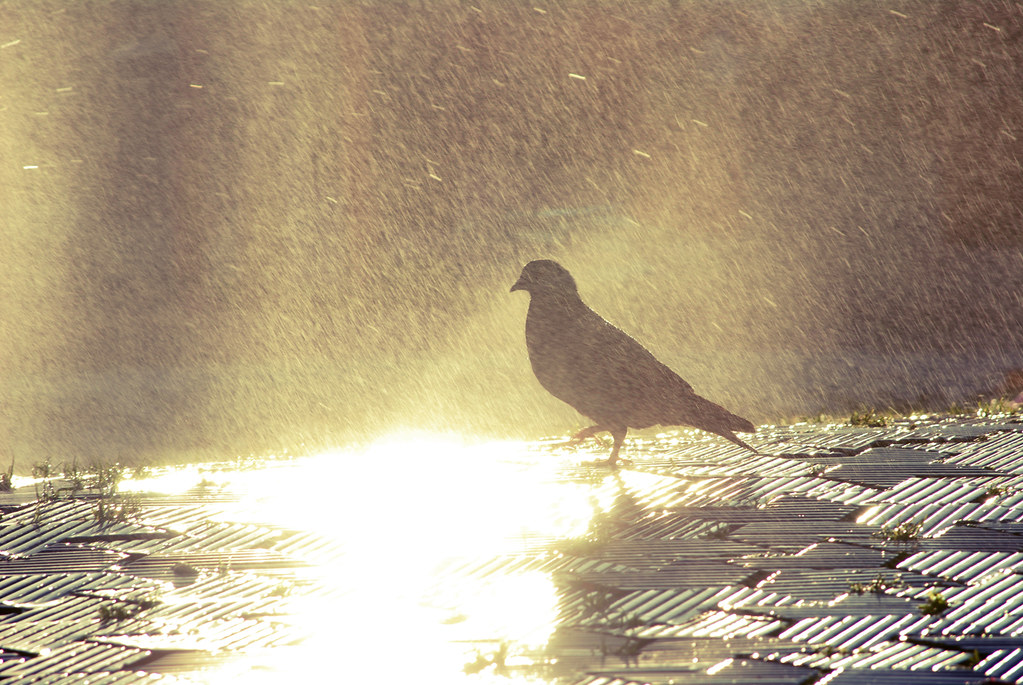
There's little doubt that social media has transformed the way people work, play, and do business. Nothing typifies this more than Kickstarter, the go-to crowdfunding juggernaut that has launched countless projects, both successful and unsuccessful, and has permanently changed the way startups (and even large corporations) approach funding. Since its inception in 2009, Kickstarter has continually stayed in the headlines and is facing increased pressure from rivals such as IndieGogo. To cater to a growing base of clientele, Kickstarter is launching a service called Drip aimed at perpetually funding projects, which is an ideal setup for creative artists like photographers, writers, and podcasters, among others. Drip quietly entered the scene on November 15 and offers project owners the opportunity to offer their backers a subscription-like service, somewhat like Patreon.  Image via Pexels. The service will see a wider release sometime in 2018. According to the British Journal of Photography, one of the first creatives invited to the platform by Kickstarter is Dan Wheeler and Jack Howe's The Photo Parlour Nottingham. The photo parlour was an old fashioned lab “that boasted black-and-white and colour darkrooms and a dip'n'dunk processor.” Of the place, owner Dan Wheeler said: “It was dead! But I had to take it on when the opportunity presented itself. Now there's nowhere like it. There's nothing like a community darkroom with a strong membership anywhere else in The Midlands. We have a gallery, a studio, an amazing photo book library full of first editions, and a library of cameras. If you randomly grab in any direction in here you'll find something interesting. All this amazing stuff in one little unit in Nottingham!” Subscribers to the Drip for the photo parlour will be provided with inside access podcasts, videos, and more, many featuring local photographers but also photographers from other areas. Dan is really encouraged by the platform and looks forward to the future as a partner with Kickstarter. In discussing his goals for the Drip campaign, Wheeler said: “I've always been into punk and DIY stuff…And the reason punk was punk was because people didn't agree with the way the industry was run, so they did it themselves instead. Back in the 1990s and 2000s I didn't want anything to do with the male oriented, closed-off, photography industry. I want this place to combat that.” While Patreon is a dominant force in the subscription-model crowdfunding space, it is not without competition. Given Kickstarter's robust suite of features already, Drip might just the answer to the perpetual solution of how to fund a creative endeavor. The post Kickstarter Announces New Service – Drip – Designed for Long-term Funding of Projects appeared first on Light Stalking.  INON Z-330 FlashAfter Inon ceased production of the well known Z240 strobe earlier this year, there has been much interest in their planned replacement. Inevitably, specifications and images of Inon's new strobe are now leaking out. It is to be called the Z330 and utilizes the same, proven body design of the Z240.  Its output has been increased significantly, with a quoted guide number of 33 (compared to 24 for the Z240). Beam angle without a diffuser is 110°, and Inon claims that it has a; “robust and durable construction against the heat generated by the flash (especially in burst.)” center> Other new features include a “duckbill” rotating light shade to prevent light bleed into dome ports (to across the sand), a “super wide” diffuser and glow in the dark controls with improved large easy to use controls. center> The control layout and battery compartment are identical to those of the Z240 and the built in LED focus light has an output of 220 lumen. Actual release/shipping dates, along with prices are to be confirmed. Wetpixel will be reviewing these very shortly! When it rains, it can be easy to use that as an excuse to put your camera aside and do something else. However, rain often provides some very unique opportunities for photography that you won't find at other times. This post is a collection of beautiful photographs captured in the rain. We hope that they inspire you to get creative with your photography regardless of the weather. If you want to be better prepared when photographing during bad weather and want to produce great photographs under any condition, do check out Kent DuFault's guide Producing Top Photography in Bad Weather over at Photzy.
Photo by Kevin Dooley
Photo by Jonathan Kos-Read
Capture Great Photographs Even During Bad WeatherIf you want to be better prepared when photographing during bad weather and want to produce great photographs under any condition, you should check out the guide Producing Top Photography in Bad Weather over at Photzy. It includes practical tips on planning for a photo excursion in inclement weather, gaining insight into what to shoot in bad light, and tons of other useful tips. Go here now to check it out. The post Photographing in the Rain: 10 Amazing Photos That Will Inspire You appeared first on Light Stalking. By now people have realized the Platypod Pro Max is a very “on the go” versatile tool. Attaching a ball head and camera makes it as rock solid as a tripod. But did you know, it's just as great in the studio? I've shown how to attach an Avenger 5/8-Inch Stud so you can mount…
When buying a Hoya filter, ensure it's not a counterfeit that's, quite literally, constructed from window glass.
When buying a Hoya filter, ensure it's not a counterfeit that's, quite literally, constructed from window glass.
By now people have realized the Platypod Pro Max is a very “on the go” versatile tool. Attaching a ball head and camera makes it as rock solid as a tripod. But did you know, it's just as great in the studio? I've shown how to attach an Avenger 5/8-Inch Stud so you can mount…
Despite the gigantic volume of second hand film bodies in existence there remains, it seems, a demand for new 35mm SLRs with a retro feel. The latest is what the manufacturer is calling a remake of the Ihagee Elbaflex, which was the name for Exakta cameras sold in West Germany during the late sixties and early seventies. This remake, however, comes with a Nikon F mount. The new model will have a fully mechanical shutter with speeds of 1/2sec to 1/500sec + B, and a single stroke wind-on crank. It will be fitted with a PC socket for flash, a hotshoe, and a flash sync speed of 1/60sec. The use of the Nikon mount obviously allows it to use old and modern lenses, though there's no mention of the extent of the aperture coupling. The camera doesn't need batteries to operate as it has no built-in meter (the company says users can use an app on their phone instead), but there is an ISO dial around the rewind crank just in case. The new camera is said to be the result of a collaboration between German and Ukrainian engineers, and the camera will be built in the Arsenal factory that made the Kiev cameras. The use of the Nikon lens mount is perhaps an echo of the Kiev 17 35mm film camera that also used the Nikon mount. It's hard to be certain what the new camera is actually based on as it uses a wooden grip and modern looking buttons and dials. The new manufacturers suggest it is an Exakta Varex llb, but it has none of the distinctive body styling, antique knobs or interchangeable pentaprism/wasitlevel finder-and the Varex llb was out of production by before the name change occurred in 1969.
The Elbaflex name was introduced to get around lawsuits by the original Ihagee owner to force the East German Ihagee East (as the company became known after the war) to pay him royalties for use of his brand. The use of the name Elbaflex is once again being used to avoid conflict with the current owners of the Exakta brand name. The manufacturer expects the body to retail for $1500 when it ships in August 2018, but early backers can get it for $530. You can get the camera in a choice of four colors, and there's also a special deal that includes the Meyer Optik Trioplan 50mm or the Lydith 30mm. For more information, visit the Ihagee Kickstarter campaign page. Press Release Kickstarter Launches for the Rebirth of the Ihagee Elbaflex 35mm Analog CameraNew Analog Camera Has a Nikon F Mount (Dresden, Germany) The famous Ihagee camera brand is making a comeback, launching a Kickstarter campaign today for its first offering, the Elbaflex, a 35mm analog camera with a Nikon F mount, stylish wooden grip and a full two-year guarantee. The Elbaflex has a simple, yet beautiful design that is aimed at the photography purist. Its designers say the fully-manual camera is intended to make a statement that the art of photography is about taking your time and making each frame meaningful. Early Kickstarter backers can get the Elbaflex for pledges that start at $529, as well as bundles that will include either the Trioplan 50mm or Lydith 30mm, both of which are fully-manually and made by German lens manufacturer Meyer Optik. The camera is expected to be shipped to Kickstarter backers in August 2018, though the first 100 cameras are expected to ship to early Kickstarter backers by July 2018. The Elbaflex, which will be handmade, is expected to have a retail price of $1,500 and be on the market in the fourth quarter of 2018. The company takes its name from the German camera pioneer that in 1936 produced the famous Kine-Exakta, a camera which eventually became known as the Elbaflex in the 1970s. The new Ihagee Elbaflex is a collaboration between a team of German and Ukrainian engineers. The German side includes former engineers and technicians who have many years of experience in the production of analog and digital cameras, as well as lenses, for Leica and Schneider Kreuznach. They will provide the engineering and design leadership, while the Ukrainian side, which includes former members of the famous Arsenal factory in Kiev, will oversee production. Sometimes you can't keep a good thing down but that doesn't necessarily mean the future is always bright and the road ahead will be smooth, as Kodak is now discovering. After reporting a $USD 15 million profit for the third quarter of fiscal 2016, the iconic film maker is now reporting a loss of $USD 46 million on $USD 379 million in revenue for third quarter 2017. Kodak's Chief Executive Officer Jeff Clarke said in a press release that the downturn was mainly attributed to a slowdown in its print business, “An overall print market slowdown and rising aluminum costs have impacted our commercial print business.” In response to the loss, Clarke outlines a plan for the company to cut costs and return to the black, mainly by cutting 425 jobs and focusing on the firm's profitable Kodak Sonora Plates and Flexcel NX.  Image from LittleVisuals.co via Pexels.com. Kodak's Chief Financial Officer predicts a return to profitability in fourth quarter 2017, saying “We plan to improve our cash balance through reducing working capital and through cost actions, including focusing investments in technologies most likely to deliver near-term returns.” New York Upstate outlines Kodak's challenges as combating a decrease in siles in the commercial print industry coupled with higher costs that directly affect the Print Systems Division, Software and Solutions Division, and Enterprise Inkjet Systems Division. Also, a transitional period for vendors in the Kodak brand licensing plans have led to decreased performance in the Consumer and Film Division. Last, Kodak has faced challenges in its attempts at introducing Advanced Material and 3D Printing Division products to the market. Kodak's current corporate model relies on commercial licensing of camera products as well as providing high-grade printing materials and equipment, two sectors increasingly under pressure as higher-end smartphone and cameras capture much of the profitable market and the commercial printing sector facing similar pressures. The post Layoffs Hit Kodak After Millions in Losses appeared first on Light Stalking. The Samsung EVO Plus 256GB memory card has been awarded as CES Innovation Award.
A good workflow is such a powerful, time-saving and inspiring thing. There is even a certain romance to it – a routine of steps melting into the background that lead to a finished photograph. This creates a result to be proud of, one to inspire you to go out and photograph more, be it a product shot, an image from a recent trip to Iceland (everyone seems to be going to Iceland), or an artistic portrait. It can also be an inexhaustible source of frustration or an excuse for procrastination. I know it's certainly been all of these things for me, and the latter much more often in the past. The people behind ACDSee Photo Studio Ultimate must have had a similar experience, too, but they created tools that set up a solid workflow foundation for any photographer.  Somehow, my desktop really is this clean. I don't know how. Mind you, ACD Systems faces an obvious, towering obstacle by the name of Lightroom, a piece of software that has been the industry standard for nearly a decade now. I've used it extensively and exclusively for just about every project in the past seven or eight years. And let's be honest, for all of its faults, Lightroom has been the most popular choice with good reason. It does many things right. In light of Adobe's recent (or was it really recent?) change of policy regarding payment (among other things), however, I have felt the need to take a look around and see if perhaps there are alternatives. ACDSee Photo Studio Ultimate is certainly one. In this article, I will go through a workflow that I've been using with Photo Studio Ultimate as I got myself properly acquainted with it. While I realize it's an entirely subjective approach to managing and editing photographs, I hope that it will at least give you a good starting point from which to individualize. An important disclaimer: The license to this copy of ACDSee Photo Studio Ultimate 2018 has been provided by the company; I did not purchase it. Having said that, it's my subjective opinion and findings that you are reading here. ACD Systems (rather happily, I must add) had next to no say in it. My words are always my own. What is ACDSee Photo Studio Ultimate?Quick OverviewMany have heard – or even used – some version of ACDSee. No surprise there as it's around two decades old now and actually precedes Lightroom. But there are few areas where Adobe does not have a monopoly, and while many remember ACD Systems, it's not nearly as popular as Lightroom. Perhaps undeservedly so, because pretty much everything Lightroom does, ACDSee does too. First and foremost, Photo Studio Ultimate 2018 is an image management software. It started off as a lightweight viewer and organizer and has not lost the idea over the years. But powerful metadata and organizing capabilities are now complemented by some very useful post-processing tools for both RAW and graphic image files. More so in this high-end version than any other (and there are plenty, which explains the mouthful of a name). Photo Studio Ultimate 2018 has been specifically designed to cater to pretty much every need you may have while editing – from culling to doing extensive graphics manipulations with layers and masks. In essence, it should be the only software you need. In that sense, Photo Studio's ambition stretches beyond that of overthrowing Lightroom. It actually has Photoshop in its sights, too. But let's not get ahead of ourselves. Going against Lightroom is hard enough already – the newly updated software throws a large shadow. We'll see if Photo Studio can shine through. Learning the EnvironmentAs I have mentioned before, ACDSee Photo Studio Ultimate was created to address all the needs of a working professional photographer or artist. As such, it incorporates powerful image management tools as well as those meant for post-processing images and specifically, RAW files. Naturally, having such vast capability meant a lot of thought has to go into the interface and user-friendliness. After all, having all the tools crammed into a single screen would leave little to no room for an actual image. Let's briefly overview the ACDSee Photo Studio interface before we get started.
Even this Ultimate version is immediately friendly upon launch, but there is a whole lot going on here. Thankfully, not much is beyond customizing. By going to the Mode Configuration in the General section of the Options dialog, you can get rid of modes you find less useful. I've immediately unchecked every mode except Manage, Photos, View, Develop, and Edit. After a second thought, I got rid of Photos, too, as I did not seem to use it at all. Much like with Lightroom Modules, ACDSee has several different environments for different tasks you may want to accomplish. All of these environments (or modes) are accessible at the top-right of the screen at pretty much any time.
If you look through the screenshots carefully, you'll notice how the mode buttons in the top-right corner of the interface keep changing. ACDSee offers plenty of options to declutter the interface, and hiding access to modes that you don't find yourself using is very convenient. In the end, I even disabled the View button since View mode is very easy to access by double-clicking on any image thumbnail. I've found the button to be redundant. Manage ModeThe first mode – that opens by default each time you launch Photo Studio – is Manage. This mode is meant for navigating your hard drive, importing images (which by itself is never necessary, but rather handy all the same), applying keywords and filters, and so on. You will likely spend a lot of time here and start your work in this mode more often than not.  Manage mode screen. You will be spending a lot of time in Manage mode and thus a view similar to this (after some tinkering) should be immediately familiar. The interface is dominated by the Image Grid, as it should be. But that's not to the detriment of other information, such as metadata and even the Histogram. Navigation is easy and there are some useful quick-access tools at the bottom of the screen for image rotation and comparison. Photos ModePhotos mode is similar to Manage in that it can be used to find and view images. However, rather than letting you navigate to a specific folder on your hard drive, it shows every image that you have on your computer in chronological order, similar to how Gallery works on your smartphone. You can choose a specific year to be shown using the Timeline panel (positioned on the left by default), and further narrow it down from there if you need to. Hovering over any given image will show an enlarged preview with some basic information next to it (where the image is stored, its dimensions, and more). View ModeThe View mode is at the core of ACDSee and as the name suggests, is meant specifically for viewing images one by one, full screen. In addition to the View mode, which is launched whenever you double-click on an image within ACDSee, there is also Quick View. This is an even lighter image viewer that, by default, launches when you double-click an image anywhere on your hard drive. It's part of ACDSee, but also isn't. For the purposes of speed, Quick View does not launch the full ACDSee software. As is, View mode is already very speedy and gets on with displaying images very well once the software is up and running. A simple task, but one Microsoft has not managed to do well for decades and ACDSee always seems to get right. Develop ModeAn important mode that you are likely to end up using as much as Manage is Develop. This, as the name suggests, is designed for post-processing images. Specifically – it's the RAW converter environment (similar to Adobe Camera RAW). It offers tools to fine-tune exposure, white balance, noise reduction, and sharpening, along with some immensely powerful tools, such as Tone Curves. I will be paying a lot of attention to this mode as Develop, along with Manage, is what ACDSee simply must get right.
Develop mode holds few surprises to anyone who's used any RAW converter before, as the fundamentals are usually the same. The screen is dominated by a large image preview and there is a useful Filmstrip underneath for quick navigation within the selected folder. Notice the conveniently presented exposure and camera information right next to it (bottom right corner of the image above). The left side of the screen is where the main tools are placed by default, but the whole panel can be relocated. See those blue circles? They show which settings have been altered from their default values. Clicking on the blue circle will temporarily disable those adjustments, but not completely discard them. Edit ModeComplementing the Develop mode is Edit. This is where ACDSee starts to target Photoshop in addition to Lightroom. For some users, it will more or less replace Adobe's best-known software. It offers layers, masks, and sophisticated retouching tools – suffice to say, too much to cover in this article.
Edit mode is a whole new piece of software, it's so capable and complex. While some elements are similar to those you will find in Develop mode, a lot is different. There is a Layers panel on the right side, while the left and top portions of the interface are absolutely packed full of tools. We will cover all of the modes in more detail in upcoming articles. For the purposes of this one, however, we will mostly focus on Manage and Develop, as these two modes are crucial for RAW file management and post-processing. Image Management and Post-Processing Workflow with ACDSee Photo Studio Ultimate 2018Importing Files from a Memory CardImport is convenient even if it is ultimately not a must-use feature. It's still very much an option to just move files from the card to your hard drive the drag-and-drop way if you so wish. But the ACDSee Import tool offers to apply metadata, rename, and backup files and is simply very useful. You can even save import presets to speed up the process further if you regularly do photo sessions of specific types, and it's easy to classify them. This I like very much as it saves plenty of time once you set them up. But there is a caveat – the Import tool is really only meant for images that are not yet on your hard drive, but stored somewhere on an external device, be it a USB drive or a memory card. And while you can “import” image files that are already on your hard drive (select Disk from the Import drop-down menu using the top-most toolbar), there is little point to do so as ACDSee does not use a catalog system and you can already see all the images on your computer. So, after popping a memory card in hit Alt+G (or select Import from the toolbar at the top-left corner of the screen). At this point, you will be asked to select the source device (an external one, such as a USB drive or a memory card) and, once that is done, you'll be greeted by the Import dialog box.  Once inside the Import dialog, there's not really much control over the source directory. No way to select all images from a specific sub-folder, either. You can choose to show only images taken on a specific day or those that are new (not yet on your computer), but, other than that, you'll have to select images manually.  The Import dialog gives access to metadata presets, along with everything else. This is a powerful feature that can potentially save you a lot of time. In some cases, it may take your mind off keywords for good. Very handy, but beware of the seemingly infinite text fields in there. Importing itself is refreshingly simple on the eyes. Using the main Import dialog is rather straightforward. Select the destination via the Location section of the dialog, where you can also specify a backup location for a second copy of the files to be saved. There is an option to rename files and it's infinitely customizable. So is the metadata changes that you can apply upon import. I try to take care of this particular part of my workflow during import as it means I won't have to assign all the necessary metadata information to so many files later on. Organizing Images by Applying FiltersThe import process itself is swift. More so than with Lightroom, as ACDSee does not need to add the RAW files to an internal catalog, and can instead display them immediately. Once the images have been copied to your hard drive (or, alternatively, you've navigated to a set of images already on it) with basic metadata hopefully already applied, it's time to do the tedious task of culling. Culling your imagesI prefer to leave out as many images as I can before I move on to post-processing (during which I tend to drop a few more images), and ACDSee has plenty of filters to make the task easy.
Part of the reason why import is as swift as moving images manually from memory card onto your hard drive is that it is pretty much all that's happening. ACDSee does not add files to a catalog like Lightroom does. Another important aspect is the image preview – rather than render its own previews immediately, ACDSee uses embedded JPEGs before any edits are applied. Basically, at first, you see the exact same image as you would on the back of your camera. This can be changed in the options, as shown in the screenshot, but I'm not sure why you would. Proper previews are rendered once you start developing the files, but for the initial sorting? Embedded is probably the best way to go about it and saves so much time. It's always been a real struggle for me to sort through the initial batch of image files – it's never easy to judge your work fairly, is it? So breaking the process into several steps has helped me a lot. First things first – ratings. Photo Studio permits a numeric rating ranging from 1 to 5 to be assigned to any file. It's as straightforward as you think – the lower the rating, the less you like the image. My routine involves going through images and only assigning a 5 (Ctrl + 5) to the files I find good enough, and 1 (Ctrl + 1) to images that are safe to delete with certainty. Once I've done both and the lowest rating images are off my hard drive, I select a rating 5 filter to only see photographs that passed the initial sorting. You can do that by selecting the Filter drop-down menu above the image grid.  73 product shots of a printed catalog. And as much as I enjoyed taking the photographs and then doing the layout… I am not sure I am ready to edit 73 images of it. Let's get to culling.  See that? Ratings applied, filter turned on, and we are left with 20 images. Much better, but not quite enough. The second sorting resulted in just 8 out of the total 73. I obviously still need to dial down the trigger-happy (can't really show how I sort through images if I pick 9 out of 10, right?), but at least I don't struggle with choice quite so much. Now, I said rating 5 goes to images that are good enough for a reason – by removing a large number of similar images during initial sorting, I make it that much easier for myself to see the photo shoot as a whole and judge which photographs don't fit. At the same time, I don't pressure myself to only keep the very best images after the initial sorting, as that may take too much time. So I sort through the 5 rated photographs one more time. This time around, I assign a rating of 4 to images that are not quite what I was trying to achieve. These files get dropped, but should I change my mind, I know they are marked with 4 and are always easily accessible. I may end up deleting unrated files at some point, but I always keep the 4 rated ones just in case. Hopefully, the second sorting has left me with a small number of photographs that I really like. Now that there are much fewer files remaining, I can give each one a lot more attention. At this point, I tend to go through the files one by one in full screen view (double-click on any thumbnail or select a file and hit View mode) and pre-visualize the final result that I want to achieve as I did while photographing. What sort of editing will I need to do to each one? Will it require conversion to black and white? Is extensive retouching or complex local adjustment of tones and colors going to be necessary?
ACDSee has a lot of filtering, sorting, and grouping options. And I do mean a lot. They can all be used to narrow down which image files you want to be shown. It's not just the Filter menu, but the ones next to it, too. More often than not (the photographs I used for this article are a strange exception, which is why I won't bore you with additional screenshots), around half the images will end up being monochrome as I tend to photograph in such a manner, and they need to be separated from the color images for easier batch processing. For that, I tend to use a color label. Assigning a label to any given file is just as simple as rating images, only this time you need to use Alt instead of Control in combination with a numeric key. So, for example, Alt + 1 will result in red label (hitting Alt + 0 will reset label to none). I tend to assign the first color label (red) to images that will require conversion to monochrome and the second one (yellow) to those that are part of a panorama and will need merging. The rest of the labels still get used. If there are images of several separate panorama shots located next to one another, I use the remaining colors to separate them for easier visual discerning later on. Finally, there is one final sort that needs to be done. Using the Tag filter (the \ key), I mark images that will require more complex, graphic retouching than simple RAW converters are rarely designed for. Usually, that would mean moving on to Photoshop at some point. With ACDSee, the built-in alternative in the form of Edit mode is all many people will need. Either way, tagged image files would end up undergoing considerably more complex editing. Post-Processing with the Develop ModeTo anyone who has used Lightroom (or Camera RAW, or any other RAW image processor for that matter), the Develop mode will be instantly familiar. Perhaps not in the fits-like-a-glove sort of way, at least not at first, but there are definitely no big surprises to be had.  Ignore the identical color scheme. Develop mode is an entirely different environment to the Manage mode that we've already got to know a little bit. See how many of the toolbars at the top are now gone? The menu is different, too. Importantly, there are a bunch of sections and tools designed for local adjustments hiding just above the histogram. These are easy to miss. Don't, because they are also very useful and sometimes absolutely necessary. The filters I apply to sorted images – color labels and tags – are extremely helpful for batch post-processing. As selecting a certain filter hides image files that are to be developed in a different manner, I am not only able to apply similar adjustments to several images at a time but I can only see color or black and white images in the Filmstrip too. How is that relevant? Simple – it helps with achieving consistent luminance, contrast, and color of the photographs, as I am able to compare them and notice differences that need compensating for as I work. While photographing, I tend to leave white balance in Auto as I know my camera will get it more or less right. As for exposure, I tend to work in manual mode, especially in high-contrast lighting where prominent highlights and shadows are plentiful (as was the case with these product shots). Manual mode means my composition does not affect the exposure when dealing with the same basic scene, so while there is always the chance I may end up under or overexposing, (having gotten used to setting up my own exposure, it does not happen often), there is also more consistency shot-to-shot. And that makes adjusting exposure in post-production much simpler, as I can apply the same corrections to a few images at a time. That's made easier by the Filmstrip in Develop mode – just select a few images and apply the adjustments as needed. Alternatively, you can process a single image and then copy/paste the settings onto a different image. Both actions are accomplished by right-clicking on the thumbnail in the Filmstrip to first copy, and then paste settings to a corresponding file.  Adjusting exposure and white balance to taste gives me a good starting point from which to dive a little deeper. But since I'm using the General adjustments anyway, I might tweak a few more sliders while I'm at it. After adjusting the white balance and exposure sliders (which, strangely and inconveniently enough, only allows 4-stops of adjustment, 2-stops each way), I had a solid starting point from which to move on to more specific tone and color adjustments. ACDSee has plenty of tools for that, perhaps even too many. In the General section of Develop tools, there's Highlight Enhancement and Fill Light sliders. Both of these can only be set in one direction, meaning a positive adjustment or nothing. What's more, Fill Light encompasses a very broad range of tones, from dark ones all the way to highlights. So if you're used to Lightroom adjustments of highlights and shadows, you'll find it a little sensitive. On the other hand, Fill Light might just save you if you've underexposed your RAW file by more than the 2-stops the exposure slider allows you to compensate (with modern image sensors, you may find yourself doing that on purpose, too).  I expected the Fill Light slider to only really “fill” the shadows, but it did a bit more than that. I find this a little too close to how fill flash works while photographing. That said, it's not without uses and ACDSee does have alternative tools, should you require finer tweaking. Either way, it's a good thing there's an alternative tool in the shape of Light EQ, which is much more akin to the blacks/shadows and whites/highlights adjustments Adobe's software incorporates. Using it is also very easy – simply select the tool and click on any area of the image. Light EQ will adjust the tones automatically – brighten them up if you click on a shadowy area, and bring the tones down should you click on a bright, highlight-intensive bit of the image. Want more control? Choose Standard (which I prefer), or Advanced mode (a touch confusing), which will allow you to click-and-drag on the photograph itself, in addition to using the sliders. Clicking on any tone will adjust it across the whole image – drag up to increase brightness, down to deepen the shadows or restore highlights.
In case Light EQ is also not to your liking, there's the trusty Tone Curves tool. These tools tend to work pretty much the same everywhere. In simplicity lies its strength, as the Tone Curves tool is immensely versatile.  Before Curves.  After a Tone Curve was applied. I can't stress enough how powerful (and sometimes complex) the seemingly boring Tone Curves tool is. As you can see from this before/after comparison above, not only does it affect tonal contrast, but also color. Pull down the shadows and you'll notice saturation increase. You may find yourself needing to compensate for the increase in saturation via the Saturation slider or the Color EQ tool. Either way, Develop mode offers plenty of control over all the tones in your image.  If I had to single out a favorite tool of mine in Develop mode, it would be Color EQ. Much like HSL panel in Lightroom, it allows very precise control of color. I was able to bring down the orange hues of the table while keeping the beautiful reds and greens just so (for my taste). It helped me achieve decent consistency across the whole selection of images with minimal effort.  This particular product shot only really needed so color adjustment, which was achieved using the Color EQ tool more than anything else. I've also pushed the mid-tones a bit using Tone Curves, but not enough to burn out the highlights. For the images I tasked myself with editing, I mostly used a combination of Light EQ, Tone Curves, and Color EQ, setting up each one to taste. The latter is, again, extremely versatile and works much like HSL panel does in Lightroom. It allows you to adjust the saturation, brightness, and hue of each individual color channel (see screenshot above). As you may notice in the screenshots, I went for a very desaturated look (mostly the red, orange, and yellow channels). Whatever you choose to do, Color EQ offers plenty of control and is perhaps by far my favorite tool in the Photo Studio Ultimate Develop mode. Lastly, I added a little warmth to shadows using the Split Tone tool (Shadows Hue set at 44, Saturation at 4, and Balance at 24), and adjusted Sharpening in the Detail tab of the Develop Tools panel.  The Geometry panel is accessed via a tab at the top of Develop Tools. Here, you can crop and adjust an image for distortion. It's great that ACDSee has lens profiles to take care of distortion for you, though any vignetting you may want to fix, is up to your own judgment for now.  Before image.  After processing. There's a Whole Lot MoreScratch the surface, I told myself when I started writing this article. At least scratch the surface. I am still unsure if I managed to do that. There is more luck than planning involved in my choice of images for this article. Should I have gone for something more demanding – an artistic portrait, perhaps – it would have been at least twice as long. ACDSee Photo Studio Ultimate 2018 (to use its full set of names) is immensely packed with tools and settings. So much so that I used only a small fraction of what Develop mode offers for my product shots. Black and white conversion was left untouched, so were the local Develop Brush and Gradient tools. These edits required next to no Geometric correction or attentive use of noise reduction, not to mention Edit mode. Even so, it has proved to be an exceptionally versatile bit of software. My hope is this article has provided you with an insight into how ACDSee works and how it can be used as part of an efficient, stress-free workflow for your business and artistic needs. Disclosure: ACDSee is a paid partner of dPS. The post ACDSee Photo Studio Ultimate: Efficient RAW Workflow for Professionals by Romanas Naryškin appeared first on Digital Photography School. Medium format snappers, architectural photographers, and landscape photographers, here's something that should tickle your fancy. Swiss camera maker ALPA has recently introduced its latest camera package for film photographers: the ALPA 12 SWA equipped with ALPA Apo-Helvetar 5.6 43 mm lens. You'd have to be fast, though, as it's super limited edition with only five kits up for grabs.
It really couldn't get more retro than Polaroid, the instant camera that enables you to capture the moment and print instantly. Polaroid have now released the Polaroid Pop, and all just in-time for Christmas, making a perfect gift idea. This new sleek camera is capable of producing 3.5×4.25-inch prints that will keep family and friends amused over the festive season. The new Pop features the readily available 3.5×4.25 Polaroid instant print format. This isn't however a tradition Polaroid instant camera, the retro inspired styling takes on an ultra modern twist and the camera itself will be available in a variety of colours including; Yellow, Pink, Black, White, Blue and Green. Flip the camera over and you'll see a large 3.97-inch built-in LCD so you can preview your images and check the composition before you take. Images are captured at a very decent 20mp resolution. These images can then be printed directly from the camera through the built in ZINK Zero printer, as we all expect from a Polaroid. If you don't want to print there and then you don't have too. As this Polaroid is completely digital you can either save those images for later (This model accepts MicroSD cards up to 128GB in capacity) or Wi-Fi or BlueTooth them across to another device. Keeping up with the latest trends the Polaroid Pop will also enable you to shoot 1080/720p full HD video and 15-second Gifs. The new Polaroid Pop is available now for £199, for more information check out the Polaroid website. The post New ultra compact Polaroid Pop hits the streets appeared first on Camera Jabber. This year has been phenomenal for instant photography, especially for Polaroid Originals and the iconic Polaroid cameras. On top of new films, new cameras, improved emulsions, and everything in between, the icing on the cake is a new documentary about the magic of Polaroid photography. |
AuthorDies und das zum Thema Leben. Archives
Januar 2019
Categories |


 RSS-Feed
